
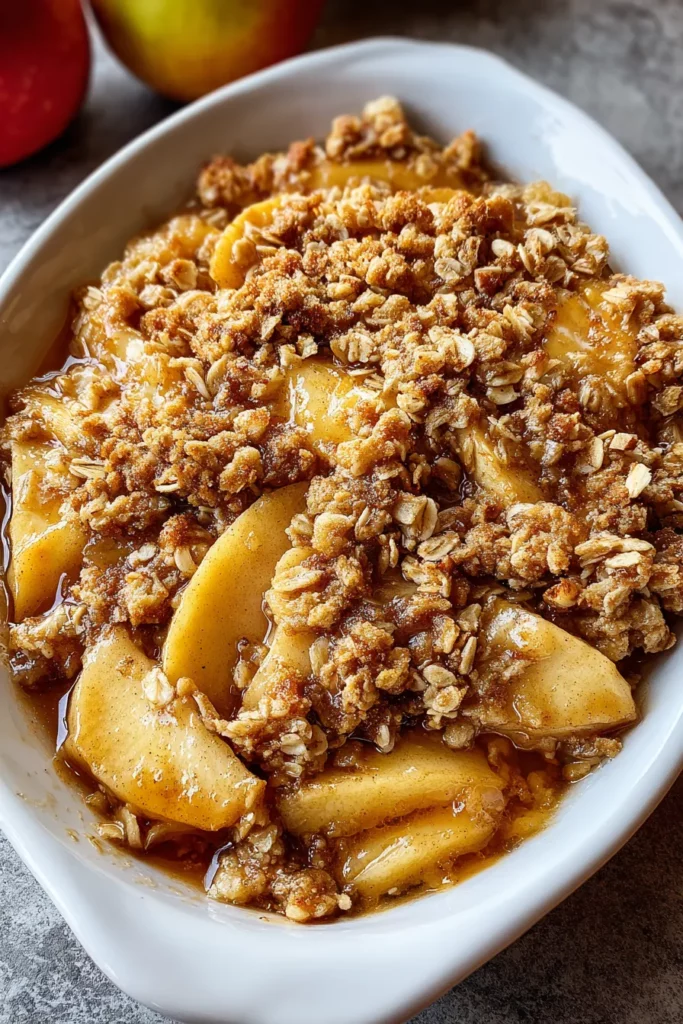
Few desserts have the power to wrap you in cozy comfort quite like a warm apple crisp. Each forkful brings together the bright tartness of freshly peeled and sliced apples with a rich, buttery oat topping that’s kissed by cinnamon and nutmeg. This homemade Classic Apple Crisp is the ultimate easy dessert for both novice bakers and seasoned home cooks. With just a handful of pantry staples—apples, sugars, flour, oats, and a few spices—you’ll create a treat that’s as inviting as it is delicious. As a bonus, it’s a beginner-friendly recipe with a total prep time of 15 minutes, 35 minutes of baking, and a quick 5-minute rest before serving. This delightful dessert clocks in at around 350 calories per serving, making it an ideal finale to a cozy family dinner or an autumn gathering of friends.
I’ve lost track of how many times I’ve dusted off this recipe in fall, but each time feels just as exciting as the first. There’s something undeniably nostalgic about biting into warm apples wrapped in a crunchy, sweet topping—that perfect blend of sweet and tart. Whether you’re pulling this Classic Apple Crisp from the oven on a crisp Saturday afternoon or preparing it as the showstopper for a holiday potluck, it never fails to draw smiles. Plus, swapping in different apple varieties or tossing in chopped walnuts or pecans kicks the flavor up another notch. Consider this your soon-to-be go-to comfort food, proof that simple ingredients can create something spectacular.
Before we dive into the method, let’s take a look at the star players in our Classic Apple Crisp. Each ingredient has a role to play, from building flavor layers to creating that crave-worthy crunchy topping.
These are the backbone of the dish. Varieties like Granny Smith or Honeycrisp bring bright acidity that balances the sweetness of the topping and helps the fruit hold its shape while baking.
A splash of fresh lemon juice prevents the apple slices from browning and adds a subtle zing that enhances the fruit’s natural flavors.
This dissolves around the apple slices during baking, melding into the fruit juices and adding straightforward sweetness without overpowering.
Warming and aromatic, cinnamon infuses both the apples and the topping with its woodsy, slightly spicy notes.
Acting as a binding agent in the topping, flour helps achieve that perfect crumbly texture when combined with butter and sugar.
Packed with molasses, brown sugar lends a deeper, caramel-like sweetness and contributes to the crisp’s rich color.
These add hearty texture and rustic charm, creating the golden, crunchy surface we all love.
Softened butter is cut into the dry ingredients, releasing flaky pockets of richness that bake into a tender, buttery crust.
Just a pinch brings floral warmth and a hint of spice that complements the cinnamon without overwhelming the palate.
Walnuts or pecans introduce an extra layer of crunch and nutty flavor, making each bite even more satisfying.
With our ingredients prepped, you’re ready to craft a homemade apple dessert that feels fancy but comes together in a flash. Follow these detailed steps for crisp perfection.
1. Preheat your oven to 375°F (190°C). Position a rack in the center to ensure even baking and a golden topping.
2. In a large bowl, toss the sliced apples with lemon juice. This ensures every slice is evenly coated to maintain its color and add a hint of brightness.
3. Sprinkle granulated sugar and 1/2 teaspoon of the cinnamon over the apples. Toss gently so the sugar and spice cling to each slice. Transfer the apple mixture into an ungreased 8-inch square baking dish, spreading it into an even layer.
4. In a separate bowl, combine the flour, brown sugar, rolled oats, and the remaining 1/4 teaspoon of cinnamon. Stir in the ground nutmeg and, if you like extra crunch, the chopped nuts.
5. Use a fork or a pastry blender to cut the softened butter into the dry mixture until it forms coarse crumbs. Look for pea-sized bits that will bake up flaky and crisp.
6. Sprinkle the crumbly topping evenly over the apple layer, covering every nook and cranny for maximum crunch.
7. Bake for 30–35 minutes, or until the apple juices are bubbling and the topping is a rich golden brown. The center should be tender but not mushy.
8. Remove from the oven and let the apple crisp cool for at least 5 minutes. This brief rest allows the juices to set slightly, making serving neater.
9. Serve warm, ideally with a scoop of vanilla ice cream or a generous dollop of whipped cream to elevate the cozy flavors.
After waiting patiently for your apple crisp to cool just enough, it’s time to plate and savor every comforting bite. How you serve this dessert can elevate the experience, turning a simple treat into a memorable finale. Here are some delightful ways to present your creation:
A generous scoop of smooth, creamy vanilla ice cream melts slowly into the warm apple filling, creating dreamy ribbons of sweet, cold cream that perfectly contrast the crisp topping.
Thread your favorite caramel sauce through a piping bag or spoon it over each individual serving. The sticky, buttery caramel seeps into the apples, amplifying the dessert’s rich, sweet notes.
A fluffy cloud of whipped cream crowned with a light sprinkle of ground cinnamon adds both visual appeal and a subtle spice that plays beautifully against the apples.
Serve slices alongside a chai latte, coffee spiked with a cinnamon stick, or a cup of hot apple cider. The warm beverage complements the baked apple flavors and keeps the cozy vibes rolling.
Storing your leftover apple crisp properly ensures you can enjoy its comforting goodness days—or even weeks—later without sacrificing taste or texture. Follow these tips to maintain freshness:
Cover the baking dish tightly with plastic wrap or aluminum foil and leave it on the counter for up to 24 hours. This keeps the topping crisp without the chill of refrigeration.
Transfer cooled apple crisp into an airtight container or keep it in the covered baking dish. Refrigerate for up to 4 days, uncovering it briefly before reheating to revive the crunch.
For longer storage, portion the cooled crisp into freezer-safe containers. Freeze for up to 2 months. Thaw overnight in the fridge before reheating to keep the topping from getting soggy.
Whether refrigerated or thawed from frozen, rewarm single servings in a preheated 350°F (175°C) oven for about 10 minutes. This brings back that golden crunch without drying out the apples.
Wrapping up our journey through this Classic Apple Crisp recipe, we’ve explored every step—from selecting the best tart apples and spices to stirring together a delightfully crumbly topping. With a total cooking time of just under an hour, this dessert is perfect for beginner bakers and busy home cooks alike. You’ve learned how to balance sweetness with acidity, how to cut butter into flour for that irresistible texture, and how to achieve a gorgeous golden-brown finish. In addition, we’ve touched on serving ideas—ice cream, caramel drizzles, whipped cream—and shared storage tips that will keep your crisp fresh and crunchy whether you enjoy it the next day or months down the line. Remember: this is an easy dessert with endless room for personal flair, whether you toss in extra nuts, switch up the apple varieties, or play with alternative flours for a gluten-free twist.
Feel free to print this article and save it for future gatherings, cozy nights in, or whenever you need a warm, comforting treat. You’ll also find a helpful FAQ below to answer common questions that might pop up as you bake. If you give this Classic Apple Crisp a try—whether it’s your first time baking or you’re a kitchen veteran—please drop a comment, ask any questions, or share your own tips and tweaks. Your feedback helps this recipe grow and evolve, making it even better for the next person who falls in love with a simple, homestyle apple crisp. Enjoy every warm, crunchy bite!
This Classic Apple Crisp features tender apples topped with a buttery, crunchy oat mixture. It's the perfect harmony of sweet and tart, creating a delightful treat any time of year!

Hi! I’m Max Turner, the recipe hacker, flavor hunter, and home-cook behind RecipesAsSeen.com. Like most guys, I’ve lost count of how many times I’ve seen a mouthwatering recipe on TV, TikTok, or YouTube and thought, “Is that even legit?” That curiosity (and hunger) turned into this blog.