
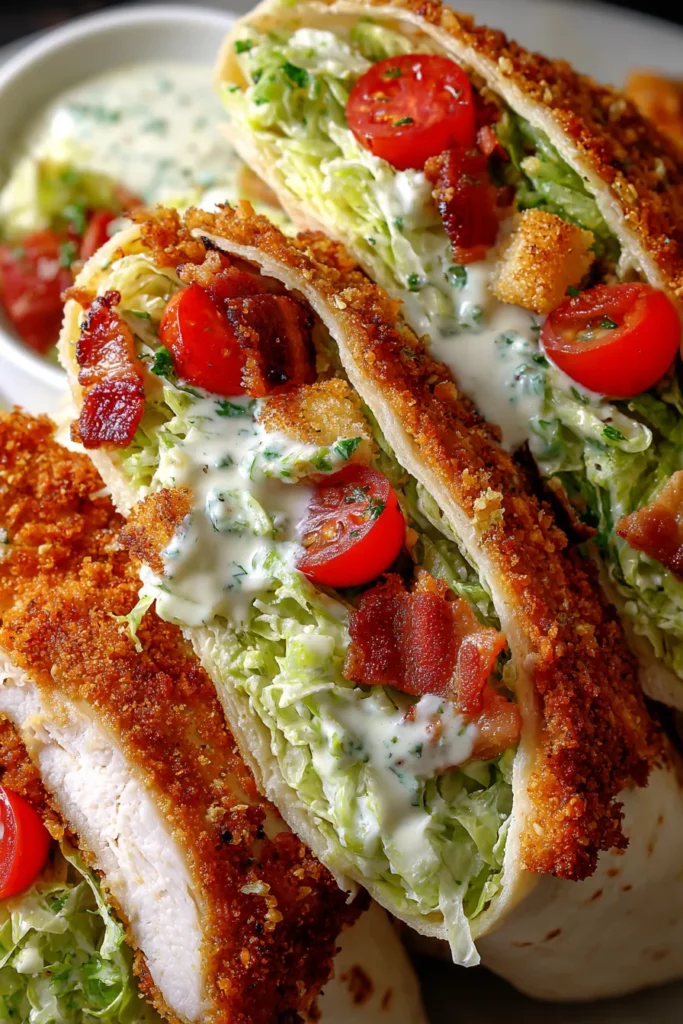
There’s something incredibly satisfying about the contrast between a perfectly golden, crispy chicken strip and the cool, creamy tang of Caesar dressing, all wrapped up in a soft flour tortilla that hugs every ingredient just right. These Crispy Chicken Caesar Wraps are like a flavor party in your mouth—crunchy, savory, and refreshingly bright all at once. With that first bite, you’ll get the gentle snap of panko-coated chicken, followed by the salty kiss of Parmesan and bacon, then the juicy burst of cherry tomatoes dancing with the crisp romaine. It’s a lunchtime upgrade that feels indulgent yet balanced, perfect for when you want something more exciting than a soggy sandwich or a basic salad. You might find yourself dreaming about these wraps the night before you make them!
These wraps aren’t just about taste—they’re all about convenience and customization, too. As a busy home cook, you’ll love the fact that this beginner-friendly recipe takes about 20 minutes to prep and another 20 minutes to bake, making it an ideal choice for a quick weeknight dinner or a meal-prep superstar that keeps well for lunches all week. At around 550 calories per serving, you get a hearty portion of protein, veggies, and carbs that will keep you fueled without weighing you down. Plus, the recipe is endlessly adaptable: swap in whole wheat tortillas for extra fiber, marinate your chicken in buttermilk and hot sauce for a tangy kick, or toss in red onion and cucumber slices for more crunch. Wrap up your lunch with these crispy, flavorful Chicken Caesar Wraps that will satisfy your cravings and keep you coming back for more!
Before you dive into making these wraps, let’s take a quick tour of the star players that bring flavor, texture, and nutrition to every bite. Each ingredient has its own special role, from building the perfect golden crust on your chicken to delivering that classic Caesar zing. Here’s what you’ll need—and why it matters:
Tender and lean, these chicken strips become the protein powerhouse of the wrap once they’re sliced and breaded. They soak up seasoning beautifully and stay moist when baked just right.
These Japanese-style breadcrumbs are lighter and flakier than regular crumbs, giving each chicken strip an ultra-crispy coating that stays crunchy bite after bite.
Nutty and salty, Parmesan gets mixed with panko for a layered crispiness and an authentic Caesar saltiness that elevates the chicken coating.
A subtle, savory hit of garlic that infuses every strand of breadcrumb with aromatic depth without adding moisture to the coating.
Provides a mild sweetness and subtle tang that perfectly complements the garlic, boosting the overall savory profile of the chicken.
Essential for drawing out and enhancing flavors in both the chicken and the breading, ensuring every component tastes seasoned and balanced.
Adds a gentle heat and peppery finish that keeps the flavors from feeling one-dimensional.
The first layer in the breading process, helping the egg wash cling to the chicken and creating a base for the breadcrumbs.
Acting as the glue between flour and breadcrumbs, the eggs ensure each chicken strip is evenly coated and ready for maximum crisp.
Soft, pliable wraps that cradle the filling, making these handheld bites portable and easy to enjoy anywhere.
Crisp and refreshing, chopped romaine offers a cool counterpoint to the hot chicken, bringing crunch and bright green color.
Rich, tangy, and creamy, this dressing ties all the ingredients together and gives the wrap that unmistakable Caesar salad flavor.
Smoky, salty, and extra-crunchy, bacon adds another textural layer and a hit of savory indulgence.
Juicy bursts of sweetness that cut through the richness of the dressing and bacon, bringing freshness and color.
Even more crunch! These little nuggets deliver a playful texture that echoes the chicken’s crispiness and keeps the wrap interesting.
A light mist of oil helps the breadcrumbs turn beautifully golden in the oven without the need for deep-frying.
Let’s roll up our sleeves and walk through the step-by-step process that takes you from raw ingredients to a stack of irresistible wraps. You’ll master simple breading techniques, achieve perfect oven-fried crunch, and learn how to layer flavors for each bite.
1. Preheat your oven to 400°F (200°C) and line a baking sheet with parchment paper to prevent sticking and make cleanup a breeze.
2. Slice each chicken breast into even strips for uniform cooking, then set up three shallow bowls for the classic bread-flour-egg-crumb assembly line.
3. In the first bowl, add the all-purpose flour. In the second bowl, pour in the beaten eggs. In the third bowl, whisk together panko breadcrumbs, grated Parmesan cheese, garlic powder, onion powder, salt, and black pepper until well blended.
4. Working one strip at a time, dip the chicken into the flour, shaking off any excess, then immerse it in the eggs, and finally press it into the breadcrumb mixture so it’s fully coated in that cheesy, garlicky crust.
5. Arrange the breaded chicken strips on the prepared baking sheet and give them a light spray of olive oil to encourage a golden, ultra-crisp finish.
6. Bake for 15–20 minutes, flipping once halfway through if you like, until the chicken turns a beautiful golden brown and reaches an internal temperature of 165°F (75°C).
7. While the chicken is baking, gently warm each flour tortilla in a dry skillet over medium heat for about 20 seconds on each side. This makes them pliable and less likely to tear when you roll.
8. In a clean bowl, toss the chopped romaine lettuce with the Caesar dressing, coating each piece evenly for maximum flavor.
9. To assemble, lay one warmed tortilla flat, layer on a generous handful of dressed lettuce, then top with sliced crispy chicken, crumbled bacon, halved cherry tomatoes, and a sprinkle of croutons.
10. Roll the tortilla tightly, folding in the sides, then slice your wrap in half on the diagonal. Serve immediately and watch everyone dive in!
When these wraps come out of the kitchen, you’ll want to elevate your presentation and round out the meal. Serving them alongside complementary sides and creative garnishes makes them feel like a true restaurant-style experience—even if you’re enjoying them at home. Here are four ideas to make your Crispy Chicken Caesar Wraps stand out on any table:
Whether you’re meal-prepping for the week or saving leftovers, proper storage ensures your wraps stay fresh, crunchy, and delicious. Since the crisp textures and creamy dressing can be sensitive to moisture, these tips will help you maintain the ideal mouthfeel and flavor—even after a few days in the fridge.
This Crispy Chicken Caesar Wrap recipe brings together easy prep, bold flavors, and a symphony of textures that will make any lunch or dinner feel like a special occasion. From the first crackle of the panko-Parmesan crust to the creamy Caesar dressing melding with fresh romaine and smoky bacon, each component has its moment to shine. We’ve covered everything from ingredient insights and step-by-step baking tips to serving ideas and storage hacks—so you’re fully equipped to enjoy these wraps now and in the days to come.
Feel free to print this article and save it in your favorite recipe binder or digital folder for easy reference. You can also find a FAQ below if you need extra troubleshooting or want to explore tweaks and variations. If you decide to give these wraps a try, I’d love to hear how they turned out—share your comments, questions, or feedback. Cooking is all about exploration and community, so let me know if you need any help or have a favorite twist on this recipe! Enjoy every crunchy, creamy, savory bite.
These Crispy Chicken Caesar Wraps combine crunchy chicken strips, fresh romaine, and rich Caesar dressing for a delicious, portable meal that's sure to please.

Hi! I’m Max Turner, the recipe hacker, flavor hunter, and home-cook behind RecipesAsSeen.com. Like most guys, I’ve lost count of how many times I’ve seen a mouthwatering recipe on TV, TikTok, or YouTube and thought, “Is that even legit?” That curiosity (and hunger) turned into this blog.