
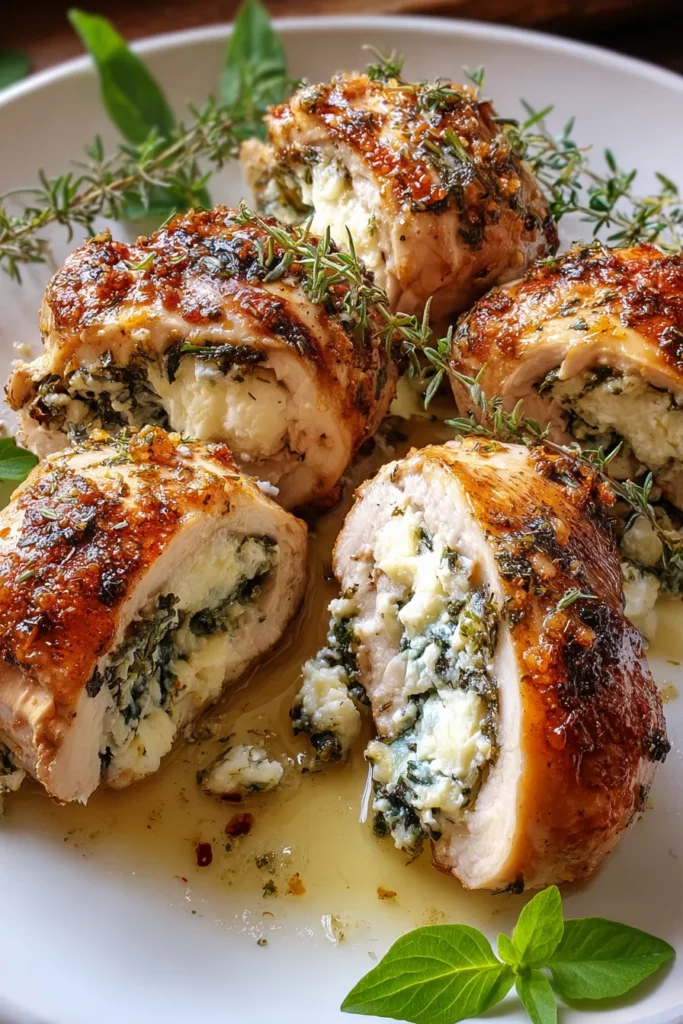
There’s something undeniably special about slicing into a tender roll of chicken, revealing a luscious center where creamy ricotta mingles with fragrant herbs. Each bite offers a beautiful contrast of textures: the golden-brown exterior gives way to a soft, flavorful filling that feels like a little celebration in your mouth. You’ll love how the fresh basil, parsley, and thyme infuse every forkful with bright herbal notes, while the garlic and lemon zest add a gentle zing that keeps you coming back for more. Whether it’s a cozy weeknight meal for two or the star of a dinner party spread, these herbed ricotta stuffed chicken rolls balance rustic comfort with a hint of gourmet flair.
I still remember the first time I made this recipe for my extended family—usually a tough crowd of picky eaters and enthusiastic food critics. As soon as that skillet came out of the oven, I heard a chorus of “Oohs,” “Aahs,” and the satisfying clink of forks against plates. It felt a bit like magic: a simple combination of common ingredients transformed into a dish that felt both elegant and welcoming. Even if you consider yourself an “intermediate” cook (just like me!), you’ll find these rolls surprisingly approachable. You’ll spend about 20 minutes prepping, another 25 minutes baking, and then take just a short rest before diving into a plate that’s roughly 350 calories per serving—perfectly portioned for a delightful dinner experience.
Every component in this recipe plays an essential role in creating a harmonious, flavorful dish. From the tender chicken that acts as the cozy embrace for a creamy filling, to the fresh herbs that uplift each bite, you’ll find that these ingredients work together like a well-rehearsed symphony. Here’s a breakdown of what you need and why it matters:
Provide the lean, tender vessels for our ricotta filling. When pounded thin and even, they ensure quick, even cooking and a delicate chew.
Delivers that dreamy, creamy texture. Well-drained ricotta results in a firmer filling that holds together beautifully inside each roll.
Offers a nutty, savory kick that deepens the overall flavor. A little bit goes a long way in adding umami richness.
Brings sweet, peppery notes with a hint of mintiness. It brightens the filling and pairs beautifully with tomato-forward side dishes.
Adds a crisp, slightly bitter edge that cuts through the cheese’s richness, keeping every bite feeling light.
Imbues earthy, subtle floral undertones. Thyme’s delicate leaves become fragrant when heated, adding depth to the filling.
Minced to tiny pieces for an even distribution of pungent, savory warmth. It complements the cheeses and herbs without overpowering.
Introduces a citrusy pop that lifts all the flavors. A small amount brings surprising brightness to each roll.
Season the filling and chicken just right. Salt enhances the natural flavors, while pepper adds a gentle heat.
Creates a golden, crisp sear on the outside of the chicken rolls, locking in juices and adding a fruity richness.
Forms the base of a simple pan sauce that keeps the rolls moist during baking and turns into a delicious drizzle.
Deglazes the pan with a hint of acidity and complexity, elevating the sauce with a refined touch.
Secure each roll tightly so nothing unravels during searing or baking, ensuring a neat, beautiful presentation.
Ready to dive into the kitchen? These steps will guide you through the process of transforming simple ingredients into an impressive main course. Follow each instruction carefully for best results, and don’t rush the resting or searing stages—you’ll be rewarded with a gorgeous crust and succulent interior.
1. Preheat your oven to 375°F (190°C), ensuring it reaches the correct heat before your chicken even hits the pan. A fully warmed oven gives you a consistent bake and reliable cooking times.
2. Take each chicken breast and place it between two sheets of plastic wrap. Using a meat mallet, gently pound each breast to an even thickness of about 1/4 inch. This technique guarantees uniform cooking and tenderizes the meat without tearing it.
3. In a mixing bowl, combine ricotta cheese, Parmesan cheese, basil, parsley, thyme, minced garlic, lemon zest, salt, and pepper. Mix well with a spoon or spatula until all ingredients are fully incorporated and you have a smooth, flavorful filling.
4. Lay each pounded chicken breast flat on a clean surface. Spread a generous amount of the herbed ricotta mixture onto each one, leaving a small border around the edges to prevent any filling from spilling out during rolling.
5. Carefully roll each chicken breast tightly, starting from one end, and secure the rolls with toothpicks to keep them closed. A tight roll ensures even cooking and that the filling stays tucked inside.
6. Heat olive oil in an oven-safe skillet over medium-high heat. Once hot, add the chicken rolls, seam side down, and sear until golden brown on all sides, about 3–4 minutes per side. This step locks in juices and creates a beautiful crust.
7. Pour chicken broth and white wine into the skillet, bringing the liquid to a simmer. The sizzling liquid will pick up all those browned bits from the pan, infusing the rolls with extra flavor.
8. Transfer the skillet to the preheated oven and bake for 20–25 minutes, or until the chicken is cooked through and the internal temperature reaches 165°F (74°C). Baking in the sauce keeps everything moist and helps the flavors meld.
9. Once cooked, remove the skillet from the oven and allow the chicken rolls to rest for a few minutes. Carefully remove the toothpicks, slice the rolls into medallions, and serve warm, drizzling the pan juices over the top for a simple but elegant sauce.
When it comes to plating these herbed ricotta chicken rolls, a little creativity goes a long way. Whether you’re serving a quiet family dinner or impressing house guests, presentation enhances the enjoyment. Pair colorful sides, fresh garnishes, and a thoughtful arrangement to turn this dish into a memorable culinary experience. Here are four ideas to get you started:
Leftovers of these herbed ricotta chicken rolls are just as delightful as the first serving, provided they’re stored properly. You’ll want to keep the rolls moist, maintain the integrity of the filling, and preserve that lovely herb flavor even after a day or two. Here are the best methods to store and enjoy your leftovers:
Thank you for joining me on this flavorful journey through herbed ricotta stuffed chicken rolls! We’ve covered everything from the initial ingredient lineup to plating suggestions and storage tips, all while keeping things conversational and fun—just like chatting with a friend over a cutting board. With its creamy, cheese-filled center and perfectly seared exterior, this dish brings a touch of culinary sophistication to any dinner table without feeling overwhelming. Whether you’re pulling together a quick weeknight meal or entertaining guests who expect something special, these chicken rolls deliver both taste and presentation that will earn you compliments. Feel free to print this article or save it for later use; having these steps and suggestions handy can turn any ordinary evening into a memorable feast. Don’t forget, there’s an FAQ section below if you have more questions about cooking temperatures, substitutions, or timing.
I’d love to hear how your own herbed ricotta chicken rolls turn out! Drop a comment if you tried the recipe, share any tweaks you made—maybe you added sun-dried tomatoes or a spinach twist—or ask for help if you hit a snag during the prep. Your feedback and questions make this cooking community so much richer, and I’m always thrilled to chat about kitchen adventures. Happy cooking, and here’s to many more delicious dinners filled with flavor, warmth, and laughter!
Imagine juicy chicken breasts wrapped around a creamy, herb-infused ricotta filling that bursts with flavor. Perfect for impressing guests or a cozy family dinner!

Hi! I’m Max Turner, the recipe hacker, flavor hunter, and home-cook behind RecipesAsSeen.com. Like most guys, I’ve lost count of how many times I’ve seen a mouthwatering recipe on TV, TikTok, or YouTube and thought, “Is that even legit?” That curiosity (and hunger) turned into this blog.