
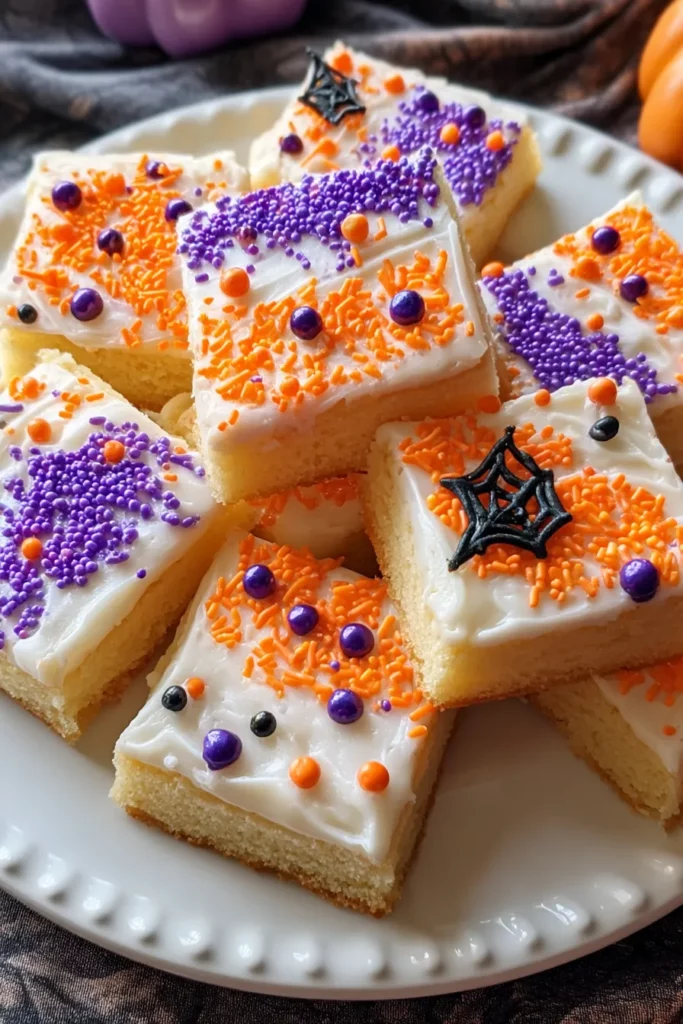
This Halloween season is all about turning simple ingredients into something spooktacularly sweet, and these Sugar Cookie Bars are here to haunt your taste buds in the best way possible. With vibrant layers of orange and purple dough, each bite feels like a carnival of color and flavor. The base is tender and buttery, giving you that classic sugar cookie taste, while festive Halloween-themed sprinkles add a playful crunch that will make everyone at the party gasp with delight. These bars are perfect for busy bakers who want a show-stopping dessert without the fuss—no individual cookie shaping required! You’ll love how the creamy frosting on top melts in your mouth, its smooth texture balancing the cookie’s slight chewiness. And bonus: they’re beginner-friendly, so whether you’re a seasoned baker or just starting out, you’ll breeze through this recipe in no time.
Beyond just being eye-catching, these bars bring a warmth that feels like a cozy fall hug. The subtle sweetness of vanilla and the rich mouthfeel of unsalted butter combine to create a comforting base, while the bright frosting and sprinkles keep things fun and festive. With about 20 minutes to prep, 20 minutes to bake, and an hour of rest time to set perfectly, you can plan ahead and even involve friends or family in the decorating process. Each bar clocks in at around 320 calories—just right for indulging without going overboard. Whether you’re hosting a Halloween party, sending treats to school, or simply craving a seasonal snack, these bars will be the life of the party and leave everyone begging for the recipe.
Before diving into hands-on baking, let’s take a peek at what makes these bars so irresistible. Each ingredient plays a special role in creating that tender crumb, bright color, and festive finish. By understanding how they come together, you’ll feel confident as you measure and mix your way to Halloween glory.
This provides the rich, creamy foundation for both the cookie base and the frosting. Softened butter helps achieve a light and fluffy texture when creamed with sugar and gives the frosting a smooth spread.
Sweetens the dough and helps create a tender crumb by interacting with the butter during creaming. Its fine crystals also contribute to that delightfully soft bite.
Acts as a binding agent, adding structure and moisture to the dough so the bars hold together nicely without becoming too dense.
Brings a warm, floral note that enhances the buttery sweetness, making every bite feel cozy and well-rounded.
The main building block for the cookie layers. Provides structure and chewiness when combined with butter and sugar.
Gives the dough a gentle lift, ensuring the bars aren’t flat and have a soft, airy texture.
Balances the sweetness and strengthens the dough’s flavor profile, making every ingredient shine.
Transforms plain dough into vibrant Halloween hues, turning ordinary cookie bars into festive masterpieces.
Adds a fun crunch and seasonal flair on top of the purple layer before baking, making the bars extra eye-catching.
The base of the frosting, lending a silky-smooth consistency and pure sweetness.
Adjusts the frosting’s thickness to make it easy to spread without running off the bars.
With your ingredients prepped, let’s talk about how to assemble these festive bars from start to finish. Each step is designed to be approachable and fun, so grab your favorite mixing bowls and baking dish—we’re ready to create something magical!
1. Preheat your oven to 350°F (175°C). Grease a 9x13-inch baking dish or line it with parchment paper to ensure easy removal and clean edges.
2. In a large bowl, cream together the softened butter and granulated sugar until the mixture is light and fluffy, about 2–3 minutes with an electric mixer.
3. Beat in the egg and vanilla extract until fully incorporated, forming a smooth, pale dough that holds together.
4. In another bowl, whisk together the all-purpose flour, baking powder, and salt. Gradually add this dry mixture to the wet ingredients, mixing on low speed until the dough comes together and no streaks of flour remain.
5. Divide the dough evenly in half. Add orange food coloring to one portion and purple food coloring to the other. Knead each portion gently until the colors are uniformly distributed.
6. Press the orange dough evenly into the bottom of the prepared baking dish, creating a smooth layer. Then, carefully press the purple dough on top, ensuring an even thickness.
7. Sprinkle Halloween-themed sprinkles over the purple layer, pressing them in gently with your fingertips so they adhere to the dough.
8. Bake for 18–20 minutes or until the edges are lightly golden. Allow the bars to cool completely in the dish on a wire rack before frosting.
9. For the frosting, beat the softened butter in a bowl until smooth, then gradually mix in the powdered sugar, vanilla extract, and milk until you reach a spreadable consistency.
10. Add orange food coloring to the frosting and mix until the hue is even and vibrant.
11. Once the cookie bars are completely cooled, spread the frosting evenly over the top with an offset spatula.
12. Add additional sprinkles if desired, then cut into bars and serve immediately or store for later.
When it comes to serving these bars, the goal is to impress friends and family by showcasing their bright colors and festive details. Whether you’re setting up a dessert table or packing treats for a school bake sale, presentation can elevate these bars from tasty to utterly unforgettable.
Arrange the bars on a multi-level stand, alternating orange- and purple-tinted layers. Accentuate each tier with mini pumpkins or candy corn placed around the edges to create a whimsical display that’s perfect for a Halloween bash.
Line a black or dark-gray platter with black lace paper doilies for a gothic touch. Arrange the bars in a neat grid, then garnish the platter with edible googly eyes or tiny plastic spiders for an extra spooky effect.
Wrap each bar in cellophane treat bags and tie them with orange and purple ribbons. Add a small handwritten tag with a fun Halloween pun to transform each bar into a personalized favor for party guests or trick-or-treaters.
For an outdoor or casual gathering, line a baking sheet with parchment, scatter some autumn leaves or candy corn around the edges, and pile the bars in the center. Invite guests to grab a bar along with a cup of warm apple cider for the ultimate fall-themed snack.
Keeping your cookie bars fresh ensures that every bite retains its perfect texture and flavor. These bars can be made ahead of time, but proper storage methods will help maintain that soft, frosted goodness for days after baking.
Place the cooled, frosted bars in a single layer inside a sealed container. Store at room temperature for up to four days, keeping them away from direct sunlight and heat sources to prevent the frosting from melting.
If your kitchen is warm or you plan to keep the bars for more than four days, store them in the refrigerator in an airtight container. Allow them to come to room temperature before serving to soften the frosting.
Wrap each bar tightly in plastic wrap, then place them in a freezer-safe bag or container. Freeze for up to two months. Thaw overnight in the fridge, then bring to room temperature before unwrapping and enjoying.
When stacking multiple layers in a container, place sheets of parchment paper between each layer to prevent the frosting from sticking. This keeps each bar’s decoration intact and makes serving a breeze.
From the very first colorful slice to the last crumbly bite, these Halloween Sugar Cookie Bars deliver everything you love about holiday baking: vibrant colors, playful decorations, and that warm, buttery flavor that makes everyone feel at home. We’ve walked through every step—creaming butter and sugar, mixing in the perfect shades of orange and purple, and creating a dreamy frosting that ties it all together. Whether you’re a seasoned baker or giving it a whirl for the first time, this beginner-friendly recipe sets you up for success with clear instructions and handy tips for storage, serving, and more. Don’t forget that these bars come together in just 20 minutes of prep, 20 minutes of bake time, and an hour of rest, making them perfect for planning ahead or enjoying a last-minute treat.
Feel free to print this article and save it for all your future Halloween celebrations—it’s ready to be a go-to reference whenever the spooky season rolls around. Below, you’ll find a FAQ section to address any lingering questions or troubleshooting tips you might need. If you dive into making these sugar cookie bars, please share your experience: leave comments, ask questions, or give feedback on how they turned out. Your thoughts help make this recipe even better for fellow bakers, so let me know if you need any extra pointers or if you’ve discovered a fun twist of your own. Happy baking, and may your Halloween be filled with sweet, colorful delights!
These vibrant Halloween Sugar Cookie Bars are a delightful treat layered with orange and purple dough, topped with festive sprinkles and creamy frosting. Perfect for adding a splash of color and sweetness to your Halloween celebrations!

Hi! I’m Max Turner, the recipe hacker, flavor hunter, and home-cook behind RecipesAsSeen.com. Like most guys, I’ve lost count of how many times I’ve seen a mouthwatering recipe on TV, TikTok, or YouTube and thought, “Is that even legit?” That curiosity (and hunger) turned into this blog.