
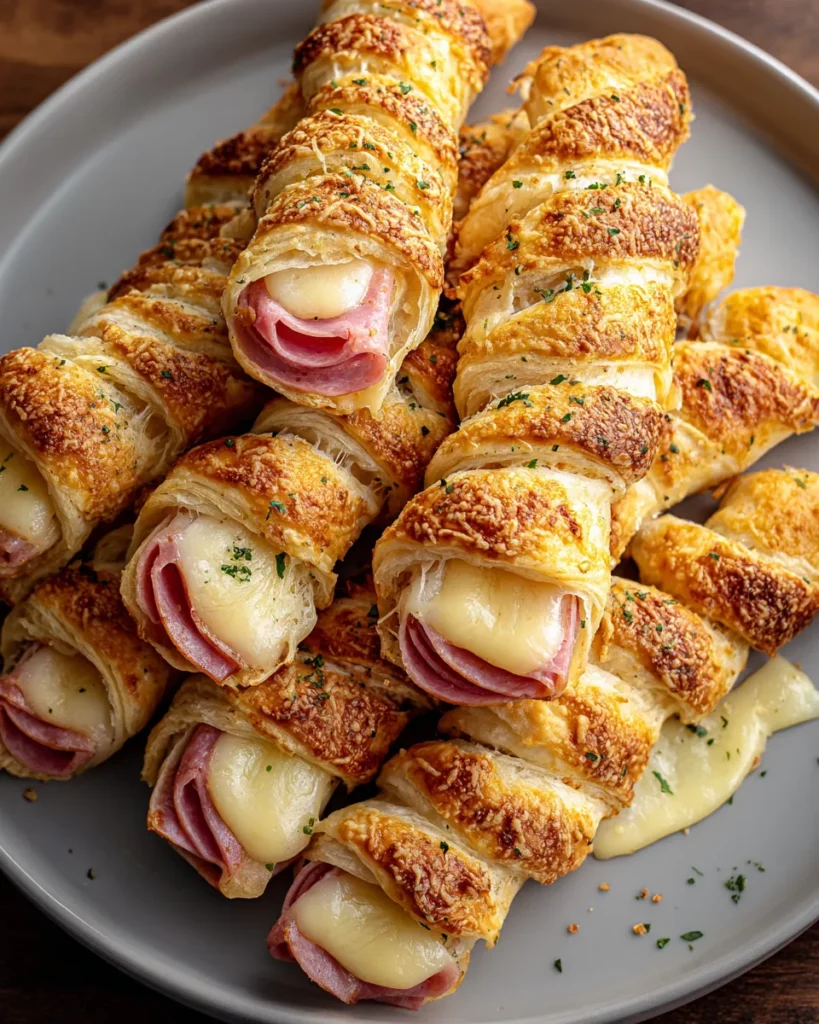
There's something undeniably comforting about biting into a golden, flaky pastry that hides layers of savory ham and gooey, melted cheese. Each crescent-dough spiral cradles a perfect combination of salty, smoky notes from the deli ham and that luscious, slightly nutty tang of melted Swiss cheese. These ham and cheese sticks aren’t just a snack; they’re mini celebrations of texture and flavor rolled into one irresistible finger food. The way the buttery dough crisps at the edges, giving way to soft, warm filling, brings a smile to any gathering—whether it’s a family movie night, a casual lunch, or a festive party spread. I still remember serving these at a small book club meeting, and watching everyone’s faces light up as they reached for “just one more.” Spoiler alert: “one more” turned into eight.
Beyond their mouthwatering taste, there’s something joyfully nostalgic about preparing ham and cheese sticks. Rolling out that buttery dough evokes memories of weekend mornings spent baking with grandparents. Slathering on a whisper of Dijon mustard adds a gentle pop of acidity that cuts through the richness, while a quick brush of garlic-butter glistens on top like edible sunshine. When these sticks emerge from the oven—golden, fragrant, and perfectly puffed—they’re an invitation to pause the world for a moment and indulge in something simple yet sensational. And the best part? You don’t need to be a seasoned chef to nail them. If you can deftly roll up a tortilla, you’re already halfway there.
Before we dive into rolling and baking, let’s highlight the star players that make these sticks so irresistible. Each ingredient brings its own magic—whether it’s flaky flakiness, savory depth, or a little herbal lift. Keep these on hand, and you’re just minutes away from snack-time bliss.
Creates a light, buttery shell that crisps beautifully in the oven. Its delicate layers offer a satisfyingly flaky texture that contrasts perfectly with the soft filling.
Brings a savory, slightly smoky profile that pairs seamlessly with cheese. Its thin slices are just the right size for rolling, lending a tender bite in every mouthful.
Melts into a silky, creamy filling. Swiss adds a subtle nuttiness, but feel free to experiment with sharp cheddar, mozzarella, or pepper jack for a bold twist.
Provides a tangy counterpoint to rich cheese and buttery dough. Just a thin smear brightens the overall flavor without overpowering the other ingredients.
Brushed on top to encourage browning and add a glossy finish. It’s the secret to that stunning golden hue and a hint of extra richness.
Sprinkled into the butter wash, this pantry staple deepens the savory notes with a gentle garlic warmth—no fresh cloves required.
An optional garnish that lends a pop of color and a subtle herbal aroma. It complements garlic powder beautifully.
Prevents sticking and ensures easy release from your baking sheet. A quick spritz means your sticks come off cleanly, with no undercarriage drama.
Let’s walk through each step so you can turn these pantry staples into a plate of golden, cheesy perfection. You’ll be amazed at how a few simple techniques transform basic ingredients into a crowd-pleasing treat!
1. Preheat your oven to 375°F (190°C). Line a baking sheet with parchment paper or lightly grease it with cooking spray to prevent sticking and ensure easy cleanup.
2. Unroll the crescent roll dough onto a clean work surface or large cutting board. Separate the dough into individual triangles along the existing perforations so each piece is ready to be filled.
3. If you’re including mustard, spread a thin layer of Dijon over each triangle. This step adds a subtle zing that balances the dough’s richness and the cheese’s creaminess.
4. Layer one slice of ham on the wide end of each triangle, then place a slice of Swiss (or your chosen cheese) directly on top. Make sure the cheese covers most of the ham to ensure an even melt.
5. Starting at the wide end of the triangle, roll the dough tightly towards the pointed end, creating a neat stick shape. Tuck the edges under to seal the filling and prevent leakage during baking.
6. Arrange the rolled sticks on the prepared baking sheet, leaving a little space between each for even heat circulation and browning.
7. In a small bowl, combine the melted butter, garlic powder, and dried parsley. Brush this aromatic mixture generously over the tops of the sticks to promote a golden finish and add delicious flavor.
8. Bake for 12–15 minutes, or until the sticks turn a beautiful golden brown and the dough is cooked through. Keep an eye on them—ovens vary!
9. Once baked, remove from the oven and let the sticks cool slightly on the pan. Serve them warm for the ultimate gooey-cheese experience.
These ham and cheese sticks are versatile showstoppers that shine on snack tables, lunch spreads, and holiday appetizers alike. Whether you’re hosting a backyard barbecue or preparing a quick midweek lunch, the right accompaniments can elevate these bites from delicious to unforgettable. Think about contrasting textures and complementary flavors: dipping sauces, fresh produce, and vibrant garnishes can transform a simple snack into a curated platter. Don’t be afraid to layer colors—juicy reds of cherry tomatoes, bright greens of herbs, and golden hues of the sticks themselves will make your spread pop. And remember, warm sticks always taste better, so plan your timing to serve them fresh from the oven. If you need to prepare in advance, consider an assortment of dips laid out in small bowls, colorful veggie sticks for crunch, and a scattering of fresh herbs for visual appeal. Now, let’s explore a few creative ways to serve these golden delights:
Whisk together equal parts honey and Dijon mustard, then pour into a shallow dish. The sweet-tangy sauce perfectly complements the savory ham and cheese, creating a delightful flavor contrast.
Gently heat marinara in a small saucepan and ladle into ramekins. The bright tomato acidity cuts through richness, making each bite feel fresh and satisfying.
Arrange slices of cucumber, bell pepper strips, and cherry tomatoes around the sticks. The crunch and vibrant color add a refreshing counterpoint to the baked dough.
Toss baby spinach, arugula, and shaved carrot ribbons with a balsamic vinaigrette. Serve alongside the sticks for a light, balanced meal that feels both hearty and wholesome.
Once you’ve experienced the magic of these ham and cheese sticks, you’ll want to savor every last bite—even if that means saving some for later. Proper storage ensures they maintain their flaky, cheesy goodness and prevent sogginess or flavor loss. Whether you have leftovers or you’re preparing in bulk for a party, these tips will keep your snacks tasting fresh and ready to reheat. Always allow the sticks to cool completely before storing to avoid condensation, which can lead to a limp texture. Choose an airtight container or wrapping method based on how soon you’ll enjoy them again. Planning to reheat in the oven? Keep them separate in a shallow, single layer. Freezing for longer-term storage? Wrap each stick individually to preserve shape and prevent freezer burn. Below are a few storage strategies that will safeguard both flavor and texture:
Place cooled sticks in a single layer inside an airtight container or covered plate. Store at room temperature for up to 2–3 hours if you plan to serve them warm shortly after.
Once completely cooled, arrange sticks in a single layer or with parchment between them in a sealed container. Keep refrigerated for up to 3 days. Reheat in a 350°F oven for 5–7 minutes to restore crispiness.
Assemble the sticks and arrange them on a baking sheet in a single layer. Flash-freeze until firm, then transfer to a freezer bag. When ready to bake, place frozen sticks on a parchment-lined sheet, brush with garlic-butter, and add an extra 3–4 minutes to the baking time.
After baking and cooling, wrap each stick tightly in foil or plastic wrap, then store in a freezer-safe bag for up to one month. Reheat in a 350°F oven, wrapped in foil, for about 10–12 minutes or until warmed through.
From the moment you roll out that buttery crescent dough to the satisfying crunch of the first golden-brown bite, ham and cheese sticks offer a delightful journey through texture and flavor. We’ve covered everything—from the key ingredients that make each stick flaky and savory, to the step-by-step method that ensures perfect results every time. You’ve learned how to serve these bites alongside tangy sauces and crisp vegetables, as well as tips to store leftovers so every reheated stick is just as delicious as the first. Whether you’re a beginner in the kitchen or a seasoned home cook looking for a no-fuss appetizer, this recipe has you covered. Feel free to print this article and save it for quick reference—your future gatherings will thank you! And don’t forget, you can find an FAQ below to address any burning questions you might have.
I’d love to hear how your ham and cheese sticks turn out. Did you experiment with a new cheese or try a different dipping sauce? Drop a comment, share a tip, or ask any questions—feedback and kitchen stories are always welcome here. If something didn’t go exactly as planned or you discovered a secret twist that made the recipe even better, let us know. Your insights help everyone become better home cooks and keep our recipe community buzzing with delicious ideas. Enjoy your culinary creations!
These crispy ham and cheese sticks wrap savory deli ham and melty Swiss cheese in flaky crescent dough, baked to perfection. Ideal for sharing!

Hi! I’m Max Turner, the recipe hacker, flavor hunter, and home-cook behind RecipesAsSeen.com. Like most guys, I’ve lost count of how many times I’ve seen a mouthwatering recipe on TV, TikTok, or YouTube and thought, “Is that even legit?” That curiosity (and hunger) turned into this blog.