
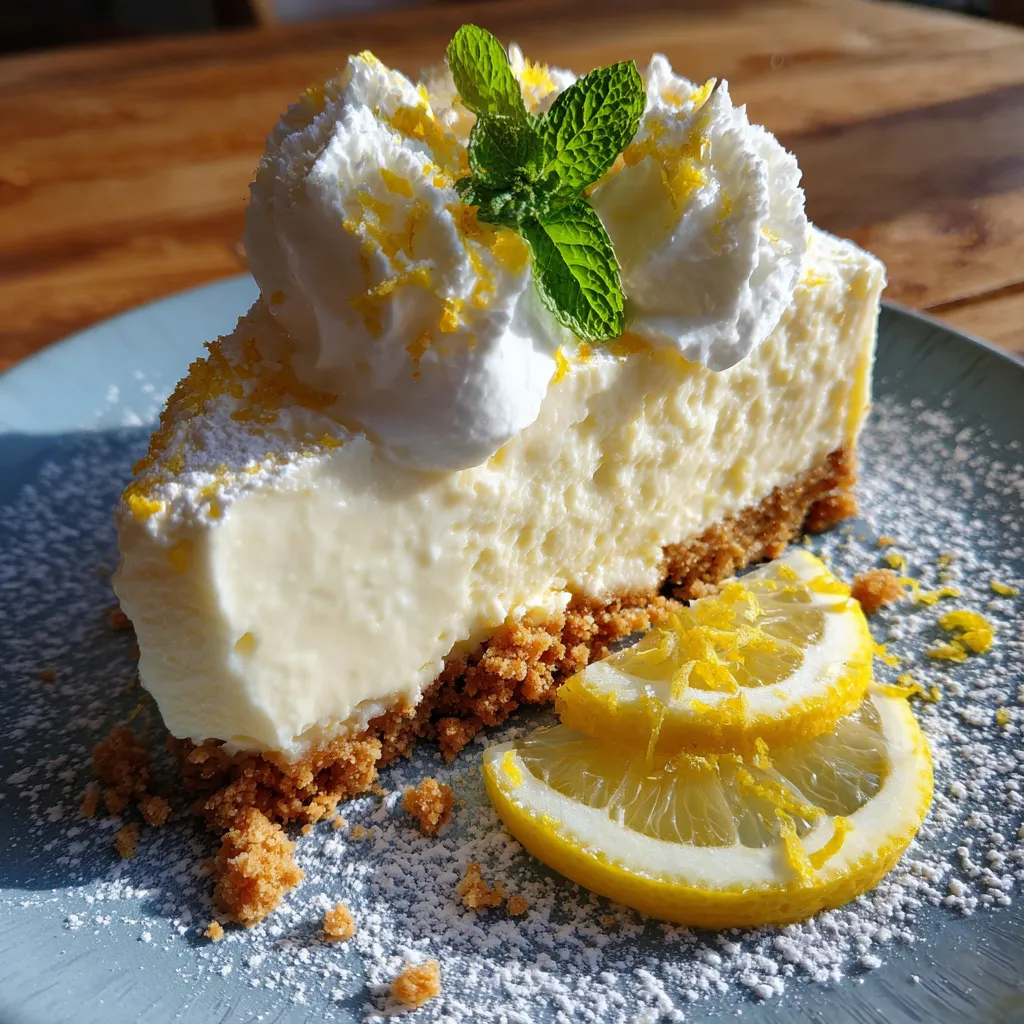
There’s something magical about a no-bake dessert bursting with zesty lemon flavor and set on a crisp graham cracker base. Refreshing No-Bake Lemon Cheesecake brings together tangy lemon and velvety cream cheese for an airy filling that melts in your mouth—no oven required. With just 20–30 minutes of active prep and a few hours chilling, you’ll have a bright, cloud-like dessert perfect for warm afternoons or as a light finish to any meal. Give it a try, and let that citrus brightness shine on your countertop!
Before you begin, gather these simple pantry staples and fresh ingredients:
Let’s walk through the steps to create this tangy, dreamy dessert. You’ll start by crafting a buttery graham crust, then bloom and dissolve gelatin for a perfect set. Next you’ll whip the cream cheese filling to velvety smoothness, fold in whipped cream for lightness, and finish by chilling until beautifully firm. Follow the detailed instructions below for flawless results.
1. In a bowl, combine graham cracker crumbs, melted butter, and granulated sugar. Press the mixture evenly into the bottom of a springform pan and chill in the refrigerator to firm up the crust.
2. Sprinkle gelatin over cold water in a small bowl and let it bloom for 5 minutes. Gently warm (either over low heat or in short microwave bursts) until fully dissolved and free of lumps.
3. In a large bowl, beat softened cream cheese and powdered sugar until smooth and creamy, scraping down the sides as needed.
4. Stir in fresh lemon juice, lemon zest, and the dissolved gelatin until evenly combined and the mixture is homogenous.
5. In a separate bowl, whip cold heavy cream to soft peaks, then gently fold it into the cream cheese mixture using a spatula to retain airiness.
6. Pour the cheesecake filling over the chilled crust and smooth the top with a spatula for an even surface.
7. Refrigerate for at least 4 hours (or overnight) until the cheesecake is fully set and holds firm slices.
8. Remove the cheesecake from the pan, slice with a warm knife, and garnish with lemon slices or fresh mint if desired.
Once your cheesecake is perfectly set, these serving ideas will elevate each slice into a show-stopper:
A few handy tricks go a long way toward cheesecake perfection:
Proper storage keeps your cheesecake fresh, creamy, and free from unwanted moisture or odors:
Here are answers to the most common queries about this zesty no-bake cheesecake:
The active preparation time is about 20–30 minutes, which includes making the crust, dissolving the gelatin, blending the filling, and assembling. After assembly you must refrigerate the cheesecake for at least 4 hours (or overnight for best results) so that the gelatin fully sets and the filling firms up.
First, bloom the 10 g of powdered gelatin in 3 tbsp cold water for 5 minutes, then gently warm it (either over low heat or in short microwave bursts) until fully dissolved with no lumps. Use full-fat cream cheese and cold heavy cream whipped to soft peaks. If you prefer a firmer texture, increase the gelatin by an extra 5 g. Make sure you fold whipped cream gently to preserve airiness while still allowing the gelatin to set the mixture.
Cover the cheesecake (either in the springform pan with plastic wrap or transferred to an airtight container) and store in the refrigerator. It will remain fresh for up to 3 days. Keep it away from strong odors and moisture to preserve its flavor and prevent soggy spots.
Yes. You can replace half the cream cheese with Greek yogurt for a tangier, lighter filling. If you want a richer mouthfeel, stick with full-fat cream cheese. You can also swap granulated sugar in the crust for brown sugar to add a deeper flavor, though this will slightly darken the crust color.
If the crust is too crumbly, you may not have used enough melted butter—aim for 100 g fully melted and evenly mixed into 200 g graham cracker crumbs with 2 tbsp sugar. If the crust is too hard, try reducing the butter slightly or pressing the mixture less firmly before chilling so it stays slightly tender.
Run a sharp knife under hot water, dry it, then slice through the chilled cheesecake in one smooth motion. Wipe the knife clean and reheat between each cut to prevent dragging or crumb buildup and ensure perfect slices every time.
Yes, you can freeze the set cheesecake for up to one month. First freeze it uncovered until firm, then wrap it securely in plastic wrap and foil. To thaw, transfer it to the refrigerator for 6–8 hours or overnight. Thawing slowly in the fridge helps maintain its creamy texture.
This cheesecake stands out thanks to its bright lemon punch, velvety cream cheese base, and a crisp graham crust that never fails to delight—and all without firing up the oven! Blooming gelatin ensures each slice holds its dreamy, cloud-like texture, while fresh lemon juice and zest bring lively citrus notes. It’s an intermediate-level recipe that’s surprisingly foolproof once you master the steps. Go ahead, print this article and stash it in your recipe collection, then let me know in the comments if you give it a whirl or need any cheerleading during those crucial chilling hours!
Tangy lemon and velvety cream cheese create an airy filling set on a crisp graham base. Cool, creamy, and bursting with citrus brightness, this no-bake cheesecake delivers melt-in-your-mouth texture without firing up the oven.

Hi! I’m Max Turner, the recipe hacker, flavor hunter, and home-cook behind RecipesAsSeen.com. Like most guys, I’ve lost count of how many times I’ve seen a mouthwatering recipe on TV, TikTok, or YouTube and thought, “Is that even legit?” That curiosity (and hunger) turned into this blog.