

There’s something irresistible about biting into a tender apple filling nestled under a buttery, crumbly topping—especially when those apples have been tossed with just the right amount of cinnamon and nutmeg to warm you from the inside out. These Apple Crisp Bars are like autumn happiness baked into every square. With a preparation time of just 15 minutes, a baking window of 35 minutes, and a brief 20-minute rest, any home cook—even a complete beginner—can whip these bars up without breaking a sweat. Each bar clocks in at about 250 calories, making them just sweet enough to satisfy a dessert craving while still feeling delightfully cozy and nourishing. Whether you’re gathering for a fall potluck, craving a late-night snack, or simply wanting a homemade treat to share with loved ones, these bars fit right in.
What I love most is how versatile they are. You can drizzle them with caramel sauce for an extra special touch, swap walnuts for pecans, or skip the nuts altogether if someone in your family isn’t a fan. The base—made from all-purpose flour, rolled oats, brown sugar, baking powder, salt, and melted butter—crams in a rustic, hearty texture that contrasts perfectly with juicy, lemon-kissed apple chunks. And speaking of apples, tossing them in lemon juice, granulated sugar, cinnamon, and nutmeg creates a fragrant, sweet-spiced filling that practically begs to be enjoyed warm. Serve a square straight from the pan or alongside a scoop of vanilla ice cream for that extra decadent twist. These bars aren’t just a dessert—they’re a celebration of fall flavors in every bite.
KEY INGREDIENTS IN APPLE CRISP BARS
Before we dive into the fun of baking, it’s helpful to know why each ingredient plays its part. Here’s what you’ll need and how these superstar components come together to create the perfect Apple Crisp Bars:
- All-Purpose Flour
Provides structure and helps bind the bars together. Its neutral flavor lets the sweetness of the apples and spices shine.
- Rolled Oats
Adds rustic texture and a subtle nuttiness. The oats create a hearty crumb topping that gives a delightful chew in every bite.
- Brown Sugar
Infuses a deep, molasses-like sweetness and keeps the topping tender and slightly caramelized as it bakes.
- Baking Powder
A touch of lift for the crust, ensuring it doesn’t become too dense under the weight of the apple filling.
- Salt
Enhances all the sweet and spiced flavors while balancing the richness of the butter and sugar.
- Unsalted Butter
Melts into the dry ingredients, creating the classic buttery, crumbly texture that makes crisp bars so irresistible.
- Apples
The heart of the recipe: peeled, cored, and diced apples provide juicy pockets of sweetness and tender fruit bites in every square.
- Lemon Juice
Brightens the apple filling, prevents browning, and adds a subtle tart contrast to the sweetness.
- Granulated Sugar
Coats the apple pieces, drawing out their natural juices and dissolving into a light syrup during baking.
- Cinnamon
Brings that classic warm, spicy note that pairs beautifully with apples in any fall-inspired treat.
- Nutmeg
Offers a hint of earthy warmth and complexity, taking the sweet-spiced profile up a notch.
- Chopped Walnuts (Optional)
Adds crunchy texture and a toasty, nutty flavor; pecans can be used instead or omitted if preferred.
HOW TO MAKE APPLE CRISP BARS
Let’s get ready to bake! In this section, we’ll break down each step to transform simple ingredients into golden, fragrant bars. Follow along closely and feel free to customize the nuts or the spice levels to suit your taste.
1. Preheat your oven to 350°F (175°C). Grease a 9×9-inch baking pan and line it with parchment paper, leaving some overhang on the sides to create easy “handles” for lifting the bars out after baking.
2. In a large bowl, whisk together the flour, rolled oats, brown sugar, baking powder, and salt. Pour in the melted butter and stir until a coarse crumb mixture forms—small clusters and loose crumbs should coat all the dry bits.
3. Reserve about ¾ cup of this crumb mixture for the topping. Press the remaining mixture firmly and evenly into the bottom of the prepared pan to form a solid, compact crust base.
4. In another bowl, toss the diced apples with lemon juice, granulated sugar, cinnamon, and nutmeg. Ensure each apple piece is evenly coated for consistent sweetness and spice throughout.
5. Spread the seasoned apple mixture evenly over the crust, creating a uniform fruit layer that will bake into tender, juicy softness.
6. Sprinkle the reserved crumb mixture on top of the apples, then scatter the chopped walnuts (if using) to create a crunchy, nutty finish.
7. Bake in the preheated oven for 30–35 minutes, or until the top turns golden brown and you can poke an apple piece with a fork and feel tender fruit underneath.
8. Remove from the oven and let cool in the pan for at least 20 minutes. Use the parchment overhang to lift the entire slab onto a cutting board, then slice into squares and serve.
SERVING SUGGESTIONS FOR APPLE CRISP BARS
Serving these bars is half the fun! Whether you’re looking to keep things simple or take them over the top, here are four delightful ways to present your Apple Crisp Bars:
- Offer a Vanilla Ice Cream Pairing by placing a warm bar on a dessert plate and topping it with a generous scoop of creamy vanilla ice cream. The contrast between hot and cold adds a delightful sensory thrill.
- Drizzle with Warm Caramel Sauce for a luscious, sticky finish. Heat caramel until it’s pourable and zigzag it across each square, letting it pool at the edges for extra gooey goodness.
- Garnish with Fresh Mint Leaves to add a pop of color and a refreshing herbal note. A couple of small mint sprigs placed artfully on the plate brighten both the flavor and the presentation.
- Dust with Powdered Sugar for a simple, elegant touch. Use a fine-mesh sieve to lightly sift sugar over the bars, creating a snow-kissed effect that complements the fall theme.
HOW TO STORE APPLE CRISP BARS
Storing your bars correctly ensures they stay fresh, flavorful, and ready to enjoy whenever the craving strikes. Here are some foolproof methods to keep them at their best:
- Refrigerate in an Airtight Container: Once cooled completely, stack the bars in a single layer or separated by parchment sheets to prevent sticking. Seal tightly and keep in the fridge for up to 3 days—it preserves the buttery crust and tender apples.
- Freeze for Long-Term Storage: Individually wrap cooled bars in plastic wrap, then place in a zip-top freezer bag. Freeze for up to 2 months. Thaw overnight in the refrigerator, then reheat in a 300°F oven for 10–12 minutes to restore that freshly baked warmth.
- Cover Loosely at Room Temperature (Short-Term): If you plan to enjoy them within 24 hours, cover the pan with foil or plastic wrap and keep on the counter. The crust stays crisp and the fruit filling remains tender.
- Reheat with Careful Warming: To revive that just-baked taste, warm individual bars in the oven at 325°F for 5–7 minutes or microwave for 20–30 seconds. This brings back the aroma and gives you that gooey, comforting texture.
CONCLUSION
Baking these Apple Crisp Bars is like wrapping yourself in a warm, spiced blanket of fall flavors—you get tender, cinnamon-scented apples hugging a buttery, oat-studded crust that crisps up beautifully in the oven. From gathering the ingredients to cutting into those first glorious squares, each step feels like a mini celebration of cozy autumn days. Use the parchment-paper overhang to lift the bars straight onto your cutting board, and don’t hesitate to get creative with nuts or additional toppings based on what you have on hand. The easy prep, beginner-friendly instructions, and flexible variations make this recipe an instant classic in my kitchen, and I hope it becomes a staple in yours too.
Feel free to print this article or save it in your favorite recipe collection for whenever you need a sweet, spiced pick-me-up. You’ll also find a handy FAQ below to answer any burning questions you might have about substitutions, storage tips, or serving ideas. If you give these bars a try, please leave a comment or drop any questions you have—I’d love to hear how they turned out, what tweaks you made, or if you ran into any snags. Your feedback helps me keep bringing you approachable, delicious recipes that feel like a chat with a friend. Happy baking!
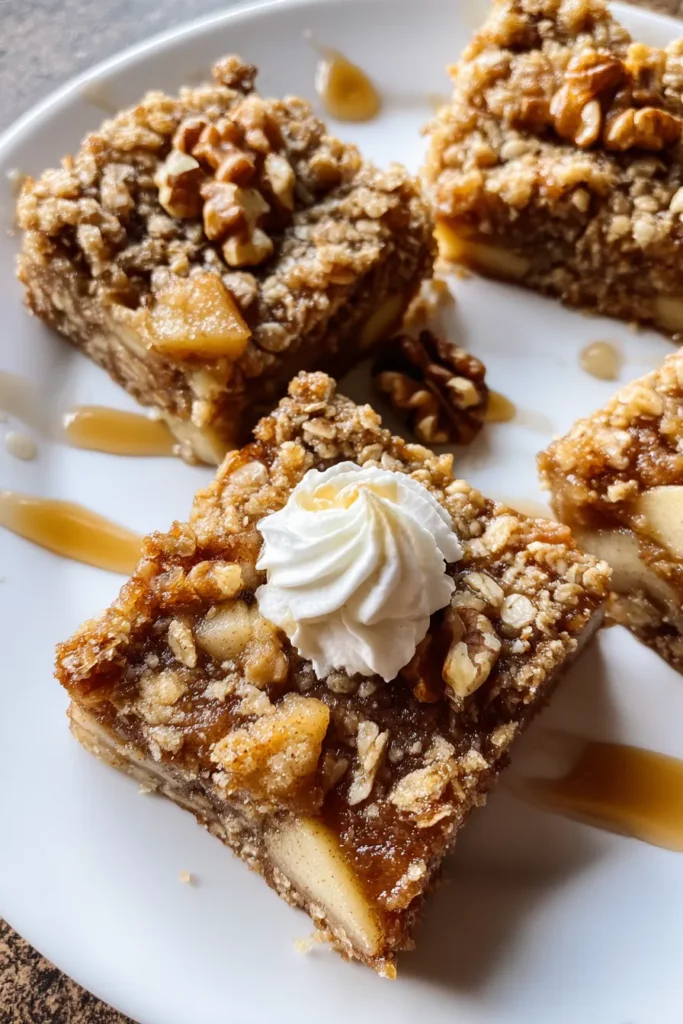

Apple Crisp Bars
Description
These Apple Crisp Bars combine tender apples with a buttery, crumbly topping for a delightful dessert. Perfect for sharing or enjoying with a scoop of ice cream!
Ingredients
Instructions
-
Preheat your oven to 350°F (175°C). Grease a 9x9-inch baking pan and line it with parchment paper, leaving some overhang on the sides.
-
In a large bowl, combine the flour, rolled oats, brown sugar, baking powder, and salt. Stir in the melted butter until the mixture forms coarse crumbs.
-
Set aside about 3/4 cup of the crumb mixture for topping. Press the remaining mixture evenly into the bottom of the prepared pan to form the crust.
-
In another bowl, toss the diced apples with lemon juice, granulated sugar, cinnamon, and nutmeg until the apples are evenly coated.
-
Spread the apple mixture evenly over the crust in the pan.
-
Sprinkle the reserved crumb mixture and chopped walnuts over the top of the apples.
-
Bake in the preheated oven for 30-35 minutes, or until the top is golden brown and the apples are tender.
-
Remove from the oven and let cool in the pan for at least 20 minutes. Use the parchment overhang to lift the bars out of the pan. Transfer to a cutting board, cut into squares, and serve.
Note
- For a caramel twist, drizzle caramel sauce over the bars before serving.
- You can replace walnuts with pecans or omit the nuts entirely if you prefer.
- Serve warm with a scoop of vanilla ice cream for an indulgent treat.
- Store leftovers in an airtight container in the fridge for up to 3 days.