

If you’re craving a quick dinner that doesn’t skimp on flavor, these Boneless Skinless Chicken Breasts are here to save the night. With a vibrant blend of garlic, paprika, thyme, and oregano, each piece sears to golden perfection, delivering a crisp, herb-kissed crust and juicy interior. Ready in under 30 minutes, they fit effortlessly into busy weeknights or meal prep sessions, making them the perfect lean protein for family dinners or to power your lunches all week long. You’re going to love how simple and satisfying this recipe is—let’s dive in!
Key Ingredients
Before you fire up the skillet, let’s make sure you have everything on hand for these juicy, tender chicken breasts.
- 4 pieces boneless skinless chicken breasts: Brings lean protein and soaks up all the savory seasonings.
- 2 tablespoons olive oil: Helps the spices adhere and ensures a golden, nonstick sear.
- 1 teaspoon garlic powder: Delivers savory depth and subtle pungency.
- 1 teaspoon paprika: Adds sweet smokiness and vibrant color.
- ½ teaspoon dried thyme: Provides earthy, slightly minty herbal notes.
- ½ teaspoon dried oregano: Contributes Mediterranean herb flavor.
- ½ teaspoon salt: Balances flavors and helps tenderize the meat.
- ¼ teaspoon black pepper: Offers a sharp, warming heat.
- 1 tablespoon chopped fresh parsley: Brightens the dish with a fresh, grassy finish.
How To Make Boneless Skinless Chicken Breasts
Getting these chicken breasts just right is all about layering flavors and mastering a quick sear. You’ll blend the spices, coat the chicken completely, and give it time to rest so every bite stays juicy. Then, a hot skillet will form that irresistible crust while locking in moisture. Follow these steps closely, and you’ll have perfectly cooked chicken with minimal fuss.
1. Pat the chicken breasts dry with paper towels to remove excess moisture and ensure a crispy sear.
2. In a bowl, combine olive oil, garlic powder, paprika, dried thyme, dried oregano, salt, and black pepper, whisking until you have a homogeneous seasoning paste.
3. Rub the seasoning mixture evenly over both sides of each chicken breast, ensuring full coverage and flavor penetration.
4. Let the chicken rest at room temperature for 15 minutes or refrigerate for up to 2 hours for deeper flavor and even seasoning absorption.
5. Heat a large skillet over medium heat and add a small amount of oil if needed to prevent sticking and promote a uniform golden crust.
6. Place the chicken breasts in the hot skillet and cook for 5–7 minutes on the first side without moving them to develop a rich, browned surface.
7. Flip the chicken and cook for another 5–7 minutes, or until the internal temperature reaches 165°F (74°C), checking with an instant-read thermometer.
8. Remove the chicken from the skillet and let it rest on a cutting board for 5 minutes before slicing to allow juices to redistribute.
9. Slice the chicken against the grain and sprinkle with chopped fresh parsley before serving for a bright, fresh finish.
Serving Suggestions
These golden-chicken beauties pair well with countless sides and styles. Whether you’re after a light lunch or a hearty dinner, here’s how to elevate your meal with simple add-ons:
- Fresh Green Salad: Fan sliced chicken over mixed greens, cherry tomatoes, cucumber ribbons, and a drizzle of lemon vinaigrette for a crisp, balanced plate.
- Hearty Grain Bowl: Layer quinoa or farro, roasted seasonal veggies, avocado slices, and sliced chicken, then finish with a dollop of tzatziki or hummus.
- Classic Sandwich: Pile warm chicken onto ciabatta or brioche with lettuce, tomato, a smear of mayo or pesto, and a sprinkle of flaky salt for a gourmet-style lunch.
- Meal Prep Packs: Divide sliced chicken, steamed broccoli, and sweet potato cubes into reusable containers for grab-and-go dinners or workday lunches.
Tips For Perfect Boneless Skinless Chicken Breasts
With a few insider tweaks, you’ll consistently nail tender, flavorful chicken every time. Here are practical pointers to boost your confidence and keep dinner stress-free.
- Marinating longer enhances flavor but even a quick 15-minute rest yields good results—just be patient and let the spices work their magic.
- Adjust cooking time based on breast thickness to avoid overcooking; thinner pieces may need only 3–5 minutes per side, while extra-thick cutlets could require a couple of extra minutes.
- Use an instant-read thermometer to ensure the chicken hits 165°F (74°C) at its thickest point—this tool is your best friend against dry or undercooked meat.
- Letting the chicken rest after cooking helps retain juices and keeps it tender, so resist the urge to slice right away.
How To Store It
If you’re prepping ahead or saving leftovers, proper storage keeps your chicken flavorful and safe to eat. Follow these methods to lock in moisture and taste.
- Refrigerator: Cool the chicken completely, then place it in an airtight container or wrap tightly in plastic wrap. Store for up to 4 days and reheat gently.
- Freezer: Slice or keep whole, wrap tightly in foil and a freezer-safe bag, then freeze for up to 3 months. Thaw overnight in the fridge before reheating.
- Portion Packing: Divide into individual servings in meal-prep containers to make grab-and-go lunches throughout the week.
- Reheating: Warm in a skillet over low heat with a splash of broth or water and a lid to preserve juiciness, or microwave briefly with a damp paper towel cover.
Frequently Asked Questions
Here are answers to your most common questions about cooking and storing these chicken breasts:
- Q: How long does it take to prepare and cook this recipe?
A: Active prep takes about 10–15 minutes (drying the chicken, mixing and applying the rub), plus 10–14 minutes of cooking time (5–7 minutes per side) and a 5-minute resting period after cooking. If you include a 15-minute room-temperature rest before cooking, plan for roughly 40–45 minutes total. If you opt to refrigerate for deeper flavor, add up to 2 hours for the marinade time.
- Q: Can I refrigerate the chicken after seasoning for longer than 2 hours?
A: The recipe recommends up to 2 hours in the fridge to deepen flavor while keeping texture tender. Going beyond 2 hours can begin to draw moisture out of the meat, potentially leading to a drier texture. For food safety, avoid leaving seasoned chicken at room temperature for more than 2 hours total.
- Q: How do I ensure the chicken is fully cooked without overcooking?
A: Use an instant-read thermometer inserted into the thickest part of the breast. Once it registers 165°F (74°C), remove the chicken immediately—carry-over heat may raise the internal temperature slightly during resting. Proper thermometer use prevents undercooking and helps avoid drying out the meat.
- Q: What adjustments should I make if my chicken breasts are thicker or thinner than usual?
A: For uneven or very thick breasts, use a meat mallet to pound them to an even ½-inch thickness for uniform cooking. If breasts remain thicker than 1 inch, add 2–3 extra minutes per side, checking the temperature often. For thin cutlets under ½ inch, reduce cooking time to 3–5 minutes per side to prevent overcooking.
- Q: Why is it important to let the chicken rest before and after cooking?
A: Resting at room temperature for 15 minutes before cooking ensures the chicken cooks evenly from edge to center. Resting for 5 minutes after cooking allows juices to redistribute throughout the meat, resulting in a juicier, more tender bite and easier slicing against the grain.
- Q: Can I substitute the olive oil or adjust the spices in the seasoning mixture?
A: Yes. You can use any neutral oil with a high smoke point (avocado or vegetable oil) in place of olive oil. Feel free to swap paprika for smoked paprika for a deeper flavor or add a pinch of cayenne for heat. Just maintain the overall balance of salt, garlic powder, and herbs to ensure the seasoning complements the chicken.
What Makes This Special
This recipe shines thanks to its simple seasoning blend, quick skillet method, and foolproof resting steps that guarantee juicy, tender chicken every time. It works for busy weeknights, meal-prep Sundays, or even a casual weekend barbecue. Print this article, save it in your kitchen binder, and revisit whenever you need a go-to protein that never disappoints. If you give it a try or have any questions, drop a comment below—I’d love to hear how it turned out and help you nail it!
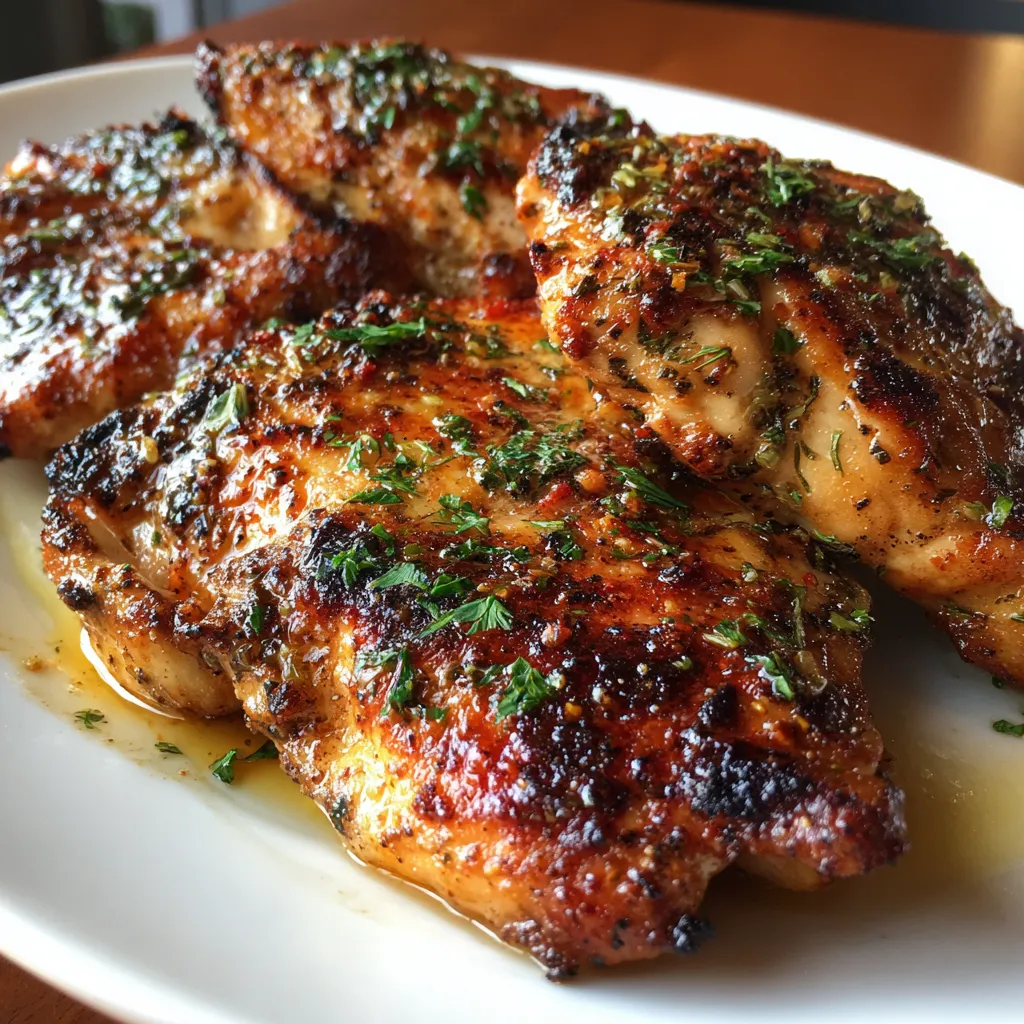

Boneless Skinless Chicken Breasts
Description
Seared to golden perfection, these chicken breasts boast a crisp, herb-kissed crust and succulent, juicy interior. Ready in under 30 minutes, they’re great for family dinners or meal prep when you need flavorful protein fast.
Ingredients
Instructions
-
Pat the chicken breasts dry with paper towels.
-
In a bowl, combine olive oil, garlic powder, paprika, dried thyme, dried oregano, salt, and black pepper.
-
Rub the seasoning mixture evenly over both sides of each chicken breast.
-
Let the chicken rest at room temperature for 15 minutes or refrigerate for up to 2 hours for deeper flavor.
-
Heat a large skillet over medium heat and add a small amount of oil if needed.
-
Place the chicken breasts in the hot skillet and cook for 5–7 minutes on the first side without moving them.
-
Flip the chicken and cook for another 5–7 minutes, or until the internal temperature reaches 165°F (74°C).
-
Remove the chicken from the skillet and let it rest on a cutting board for 5 minutes before slicing.
-
Slice the chicken against the grain and sprinkle with chopped fresh parsley before serving.
Note
- Marinating longer enhances flavor but even a short rest yields good results.
- Adjust cooking time based on breast thickness to avoid overcooking.
- Use an instant-read thermometer to ensure the chicken is fully cooked.
- Letting the chicken rest helps retain juices and keeps it tender.