

There’s something undeniably enchanting about a dessert that marries simplicity with depth, and Burnt Honey Pie does exactly that. Each slice offers a beautifully flaky crust that cradles a filling of golden, caramel-like custard—sweet yet complex, silky yet wonderfully jiggly. As you slice through the tender edges, the hint of toasted honey seeps out in warm rivulets, promising a taste that’s both familiar and intriguingly new. Cracking into this pie feels like uncovering a well-kept secret: the rich, almost butterscotch undertones mingle with a gentle hint of salt, while the vanilla adds a whisper of floral sophistication. Whether you’re hosting a cozy dinner party or indulging in a quiet moment with a cup of tea, this pie has a way of turning ordinary afternoons into memorable occasions. Its layers of texture and flavor seem to tell a story—one of careful craftsmanship, quality ingredients, and the joy of sharing something truly special with the people you love.
Baking Burnt Honey Pie is more than just following a recipe; it’s an act of transforming humble pantry staples into something utterly captivating. The process invites you to embrace a bit of patience: pressing a shortcrust dough into shape, pre-baking it to a delicate golden hue, then crafting that luscious honey custard that sets to perfection. As the pie bakes, the kitchen fills with the soft hum of anticipation—an almost audible promise that something extraordinary is on the way. This is a dessert that highlights the magic of heat and timing, where allowing the honey to turn a deep amber brings out those warm toffee notes we crave. There’s also room for creative tweaks—sprinkling a pinch of flaky sea salt on top, pairing it with a dollop of whipped cream, or draping it alongside fresh berries for a burst of tang. Trust me, once you experience the way a slice of Burnt Honey Pie wobbles slightly as you lift it to your lips, you’ll understand why it earns a permanent spot on your recipe roster.
KEY INGREDIENTS IN BURNT HONEY PIE
Before diving into the baking process, let’s get to know the stars of this show. Each ingredient plays a crucial role in building layers of texture and flavor—from the foundation of the crust to the velvety custard center. Here’s a closer look at what makes this pie so irresistible:
- All-purpose flour
This forms the backbone of the crust, providing structure and ensuring that delightful flakiness when mixed with cold fat. It’s neutral in flavor, letting the honey shine through without competition.
- Powdered sugar
Also known as confectioners’ sugar, it adds just a touch of sweetness to the dough while keeping the texture tender. Its fine consistency blends seamlessly, preventing any graininess in the crust.
- Salt
A pinch in both the crust and the filling heightens all the flavors, balancing sweetness and preventing the pie from feeling one-dimensional. It’s the secret to that irresistible depth.
- Unsalted butter
Chilled and cubed for the dough, it ensures those flaky layers form as it melts in the oven. Additional butter in the custard enriches the filling, giving it a smooth, luxurious mouthfeel.
- Egg yolk
Binds the crust dough together, adding color and richness. It helps create a tender base that stays crisp once baked.
- Ice water
Keeps the fat solid while bringing the dough together. This small amount of cold liquid ensures the crust remains flaky, rather than turning tough.
- Honey
The hero of this recipe, it caramelizes as you heat it, developing those deep, toffee-like flavors that define this pie. Quality honey makes all the difference in complexity.
- Vanilla extract
Adds a warm, aromatic undertone that complements the honey’s sweetness, weaving a gentle floral note through the custard.
- Heavy cream
Provides richness and creaminess to the custard, ensuring it’s silky smooth and holds just the right wobble once set.
- Eggs
Serve as the thickening agent in the filling, giving the custard its characteristic jiggle and helping it set to the perfect consistency.
HOW TO MAKE BURNT HONEY PIE
Let’s walk through each step of turning these simple ingredients into a dessert that dazzles. From crafting that tender crust to coaxing the perfect caramel notes from honey, every moment in the kitchen counts.
1. Preheat the oven to 350°F (175°C). This ensures consistent heat, setting the crust on its journey to flakiness while preparing the pie for its honey custard center.
2. In a food processor, combine the flour, powdered sugar, and salt. Add the chilled, cubed butter and pulse until the mixture resembles coarse crumbs—this creates those all-important layers.
3. Add the egg yolk and ice water to the crumb mixture. Pulse carefully until the dough just begins to come together, taking care not to overmix and toughen the crust.
4. Transfer the dough onto a floured surface and shape it into a disk. Wrap it in plastic wrap and refrigerate for at least 30 minutes—this chill time helps maintain the butter’s solidity.
5. Roll out the chilled dough on a lightly floured surface to fit a 9-inch pie pan. Trim any excess and crimp the edges as you like to create a charming decorative border.
6. Line the crust with parchment paper and fill it with pie weights or dried beans. Bake for 15 minutes, then remove the weights and bake for an additional 5 minutes until lightly golden. Set aside to cool slightly.
7. In a medium saucepan, heat the honey over medium-high heat. Watch closely as it bubbles and darkens to a deep amber color (about 5 minutes)—this is where the caramel magic happens. Remove from heat.
8. Immediately stir in the butter, vanilla extract, and salt until the mixture is completely smooth.
9. Gradually whisk in the cream until fully combined—this tempers the mixture and ensures a silky custard.
10. In a separate bowl, whisk the eggs until smooth. Slowly pour the hot honey mixture into the eggs, whisking continuously to prevent any curdling.
11. Pour the velvety filling into the pre-baked crust, spreading it evenly.
12. Bake for 30–35 minutes, or until the center is set but still slightly jiggly when nudged.
13. Allow the pie to cool completely before slicing to let the custard firm up and develop its full flavor.
SERVING SUGGESTIONS FOR BURNT HONEY PIE
When it’s time to share this caramel-kissed delight, consider these ideas to elevate each slice and make every serving feel special:
- Serve with a dollop of whipped cream: Lightly sweetened and whipped to soft peaks, it balances the pie’s richness and adds a cloud-like texture.
- Garnish with flaky sea salt: A quick sprinkle just before serving highlights the honey’s depth and creates an enticing sweet-salty contrast.
- Accompany with fresh berries: Raspberries or figs bring a pop of tang and color, cutting through the custard’s sweetness for a balanced bite.
- Drizzle with extra warmed honey: Gently heat a little more honey and swirl it over each slice for added gloss and an intensified flavor punch.
HOW TO STORE BURNT HONEY PIE
Proper storage ensures that every slice retains its flaky crust and creamy filling, so you can enjoy leftovers without any loss of quality:
Whether you’ve made the pie a day in advance or have leftovers needing safekeeping, follow these guidelines to maintain freshness and texture. Keep in mind that temperature and humidity can affect both the crust and custard, so aim for cool, dry conditions whenever possible.
- Store in the refrigerator: Once fully cooled, cover the pie loosely with plastic wrap or aluminum foil. This prevents it from absorbing other odors and keeps the custard firm.
- Use an airtight container: If your pie pan has a lid, that’s perfect. Otherwise, gently transfer individual slices to a sealed container to avoid crust sogginess.
- Freeze for longer storage: Wrap the entire pie (or individual slices) in plastic wrap, then in foil. Label with the date and freeze for up to one month. Thaw overnight in the fridge before serving.
- Bring to room temperature before eating: Take the refrigerated pie out 20–30 minutes before serving. This softens the custard slightly, letting the honey’s nuances shine.
CONCLUSION
What started as a humble combination of flour, butter, honey, and cream transforms into a dessert so sophisticated that it belongs at any celebration—or to elevate a simple family dinner. We’ve walked through every step: from pulsing the crust ingredients into flaky perfection, to coaxing a deep amber hue from golden honey, to whisking everything into a custard that sets with the slightest jiggle. Along the way, mindful techniques—like keeping your butter cold, pre-baking with weights, and tempering the eggs—ensure success and imbue each slice with that rich, layered taste we crave. Remember, using high-quality honey is key; it’s the heart of this recipe, delivering those nuanced toffee notes that linger on the palate. And if you’re planning ahead, the crust can be made the day before for even flakier results.
Feel free to print this article or save it for your next baking adventure, and don’t forget, there’s a FAQ below to tackle any questions that might pop up as you whip up your own Burnt Honey Pie. I’d love to hear about your experience—did the filling wobble perfectly? Did that hint of sea salt send your taste buds over the moon? Drop a comment, share your tips, or ask for any troubleshooting advice. Baking is a journey best enjoyed together, and I’m here to help every step of the way.
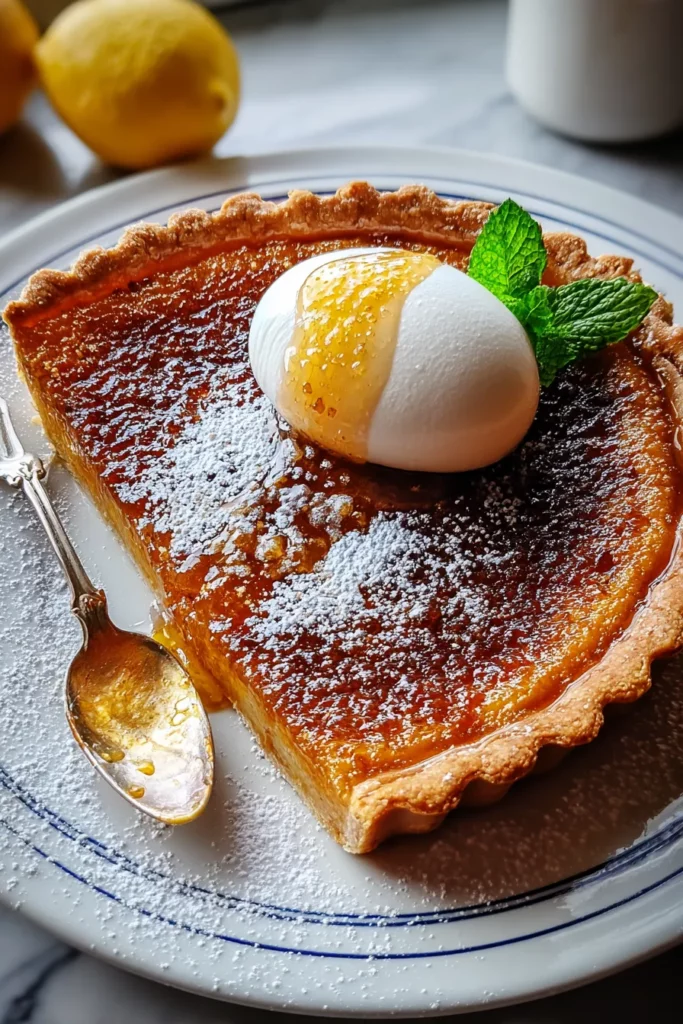

Burnt Honey Pie
Description
Savory and sweet, this Burnt Honey Pie evokes rich caramel notes with a silky, charmingly jiggly filling nestled in a flaky crust. It's a delightful treat for any occasion!
Ingredients
Instructions
-
Preheat the oven to 350°F (175°C).
-
In a food processor, combine the flour, powdered sugar, and salt. Add the chilled and cubed butter and pulse until the mixture resembles coarse crumbs.
-
Add the egg yolk and ice water to the mixture. Pulse until the dough begins to come together.
-
Transfer the dough onto a floured surface and flatten it into a disk. Wrap in plastic wrap and refrigerate for at least 30 minutes.
-
Roll out the chilled dough on a floured surface to fit into a 9-inch pie pan. Trim the excess and crimp the edges as desired.
-
Line the crust with parchment paper and fill with pie weights or dried beans. Bake for 15 minutes. Remove the weights and bake for an additional 5 minutes until the crust is lightly golden. Set aside.
-
In a medium saucepan, heat the honey over medium-high heat. Allow it to bubble and turn a deep amber color, about 5 minutes. Remove from heat.
-
Stir in the butter, vanilla extract, and salt until smooth.
-
Gradually whisk in the cream until fully combined.
-
In a separate bowl, whisk the eggs. Slowly add the hot honey mixture to the eggs, whisking continuously to prevent curdling.
-
Pour the filling into the pre-baked crust.
-
Bake for 30-35 minutes, or until the center is set but still slightly jiggly.
-
Allow the pie to cool completely before slicing and serving.
Note
- Use high-quality honey for the best flavor outcome.
- The honey should turn a deep amber for a nuanced caramel flavor.
- The pie crust can be made and refrigerated a day in advance for better flakiness.
- Serve with a dollop of whipped cream or a sprinkle of sea salt for a complementary flavor.