

Diving into the spirit of spookiness has never been more delicious than with these Halloween Cauldron Cookies! Whip up some wickedly delightful Halloween Cauldron Cookies that will cast a spell on your taste buds. These colorful, chewy monsters of sweetness deliver a perfect balance of chocolate and pumpkin spice in every bite. Picture how the puppy-soft texture yields to pockets of gooey marshmallows and melty chocolate chips, while crunchy candy-coated pieces add bursts of festive orange, black, and green colors. This beginner-friendly dessert recipe comes together in just 20 minutes of prep, 12 minutes of baking, and a quick 5-minute rest, making it ideal for last-minute parties or a cozy night in. At around 150 calories per cookie, it’s easy to indulge in a modest handful without feeling too guilty about treating yourself. The hints of pumpkin spice weave through the sweetness, conjuring autumnal memories of crisp leaves and warm sweaters.
I’ll never forget the first time I tested this recipe with my niece—she insisted on stirring the dough in three separate bowls, demanding that each be dyed a different color. As we folded in candy-coated chocolates, mini marshmallows, and semi-sweet chips, the kitchen looked like a rainbowed cauldron of mischief. My counters were a delightful disaster of sprinkles and food coloring, but the smiles on our faces were worth every drop of spilled dye. Whether you’re hosting a haunted house party, looking for fun classroom treats, or simply craving something spooky and sweet, these cauldron cookies are your golden ticket. Let’s dive into the details of how to conjure these festive delights step by step!
KEY INGREDIENTS IN HALLOWEEN CAULDRON COOKIE
Before we start mixing our witchy concoction, let’s gather the star ingredients that will make our cookies pop with flavor, color, and fun textures!
- All-purpose flour
Provides the fundamental structure and tender crumb for each cookie, allowing them to hold colorful dyes and mix-ins without collapsing.
- Baking powder
Acts as a leavening agent to give your cookies a light, fluffy rise and help them spread to a perfect chewy texture.
- Baking soda
Helps neutralize acidity and encourages browning on the edges for those irresistible golden rims.
- Salt
Enhances all the sweet and spicy flavors while balancing richness, so your cookies never taste flat.
- Unsalted butter
Gives the dough a creamy richness and helps achieve that melt-in-your-mouth sensation, while controlling salt levels precisely.
- Granulated sugar
Sweetens the dough and promotes crisp edges, providing a classic cookie taste.
- Brown sugar
Adds moisture, chewiness, and a hint of caramel flavor that complements the pumpkin spice.
- Eggs
Bind everything together and contribute to that soft, cake-like inside we all adore.
- Vanilla extract
Brings warmth and depth, rounding out the sweetness and layering flavor complexity.
- Pumpkin spice
A cozy blend of cinnamon, nutmeg, and cloves that evokes autumn vibes in every bite.
- Semi-sweet chocolate chips
Create pockets of gooey, melty goodness that balance the spice and sweetness.
- Candy-coated chocolate pieces
Infuse bursts of color (orange, black, and green) plus a crunchy texture that makes these cookies festive.
- Mini marshmallows
Soften and slightly caramelize during baking, adding marshmallowy goo for an extra treat.
- Food coloring
Black, green, and orange dyes transform dough into Halloween-themed hues that delight both kids and adults.
- Edible glitter (optional)
Adds a magical shimmer to your finished cauldrons, making them truly spellbinding.
HOW TO MAKE HALLOWEEN CAULDRON COOKIE
Ready to stir up some enchanting cookie dough? In this section, we’ll guide you through each step to create those vibrant, chewy cauldrons. From preheating the oven to folding in the final marshmallows and candy, every detail matters. Follow along closely, and you’ll end up with cookies that look as delightful as they taste!
1. Preheat your oven to 350°F (175°C) and line two baking sheets with parchment paper. This ensures even baking and prevents sticking, so your cookies come off cleanly every time.
2. In a medium bowl, whisk together the flour, baking powder, baking soda, and salt until fully combined. Setting this dry mixture aside will streamline the dough-making process.
3. In a large bowl, use an electric mixer to cream the softened butter, granulated sugar, and brown sugar. Beat until the mixture is light and fluffy, about 2–3 minutes. This step traps air, which helps your cookies rise beautifully.
4. Add the eggs, one at a time, to the butter-sugar mixture, beating well after each addition. Then, stir in the vanilla extract until the mixture is smooth and fragrant.
5. Gradually mix the dry ingredients into the wet ingredients with the mixer on low speed or by hand. Stop mixing as soon as you see no streaks of flour to avoid overmixing, which can lead to tough cookies.
6. Divide the dough equally into three separate bowls. Add a few drops of black food coloring to the first bowl, green to the second, and orange to the third. Mix each bowl gently until the dough is uniformly tinted.
7. To each colored dough, fold in a unique combination of chocolate chips, candy-coated chocolates, and mini marshmallows. For instance, you might pair the black dough with orange candies, the green dough with chocolate chips, and the orange dough with mini marshmallows. Fold just until evenly distributed.
8. Scoop tablespoon-sized balls of dough onto the prepared baking sheets, spacing them about 2 inches apart. This gives the cookies room to spread without merging into one another.
9. Bake each sheet in the preheated oven for 10–12 minutes, or until the cookies are just set and the edges begin to turn a light golden color.
10. Remove the cookies from the oven and let them cool on the baking sheets for 2–3 minutes before transferring them to wire racks to cool completely. This resting time lets flavors develop and prevents the cookies from breaking apart.
SERVING SUGGESTIONS FOR HALLOWEEN CAULDRON COOKIE
Once your cookies are cool and shimmering (especially if you’ve added edible glitter), it’s time to serve them in style. Whether you’re laying out a dessert table or surprising trick-or-treaters, these suggestions will help you display your cauldrons for maximum spooky impact.
- Themed Dessert Platter: Arrange cookies on a dark slate or black serving tray. Garnish with sprigs of rosemary (for a witchy “herb” vibe) and scatter candy eyes or plastic spiders around for a haunted forest feel.
- Cauldron Stand Display: Stack the cookies in a compact tower inside a mini cauldron or decorative pot. Add some dry ice underneath (handled with care) for a wispy, bubbling effect that will wow your guests.
- Individual Treat Bags: Place one cookie per cellophane bag and tie with orange or black ribbon. Slip in a small tag that reads “Spellbound by Sweetness” for a personalized, take-home party favor.
- Milk Flight Pairing: Offer small glasses of spiced milk—think cinnamon-infused or pumpkin-spiced lattes—next to the cookies. Label each glass with the color of the matching cookie dough for a fun tasting experience.
HOW TO STORE HALLOWEEN CAULDRON COOKIE
Keeping your cauldron cookies fresh and chewy isn’t a trick—it’s all about storing them properly! Whether you bake ahead for a big celebration or want to savor leftovers, follow these guidelines to maintain that perfect texture and flavor.
- Airtight Container at Room Temperature: Once cookies are completely cool, place them in a sealed container with layers separated by parchment paper. Store at room temperature for up to 4 days to preserve chewiness.
- Refrigeration for Extended Freshness: For an extra day or two, keep the sealed container in the fridge. Before serving, let cookies come to room temperature to restore softness.
- Freezing Individual Portions: Flash-freeze cooled cookies on a baking sheet for 1 hour, then transfer to a freezer-safe bag with parchment dividers. Freeze up to 2 months. Thaw at room temperature for 30 minutes before enjoying.
- Keep Mix-Ins Crisp: If you’re worried the candy-coated chocolates might get soft, store them separately and press them onto the cookies right after baking or just before serving.
CONCLUSION
From gathering those rainbow-hued ingredients to the moment you bite into a chewy, chocolate-studded masterpiece, these Halloween Cauldron Cookies are a symphony of seasonally inspired flavors and festive fun. We’ve covered everything—from the magical pumpkin spice and candy-coated bursts to the essential storage tips that keep your treats fresh and magical. By following the step-by-step instructions and embracing your creative spirit with color dyes or edible glitter, you’ll have a dessert that steals the show at any haunted gathering. Feel free to print this article and tuck it into your recipe binder; you’ll want to make these season after season. And don’t worry if you’re new to baking—this beginner-level cookie comes together in less than an hour, including prep, baking, and a quick rest. I’ve poured all my best tips into each section so you can breeze through the process and spend more time enjoying these goodies with family and friends.
I can’t wait to hear how your cauldrons turned out! You’ll find a FAQ below to tackle any burning questions—whether it’s substitution ideas, troubleshooting dough consistency, or getting the perfect color hue. If you try this recipe, please leave a comment, share your flavor twists, or ask for any help you need. Baking is all about community, and your feedback makes it even more special. Happy haunting and happy baking!
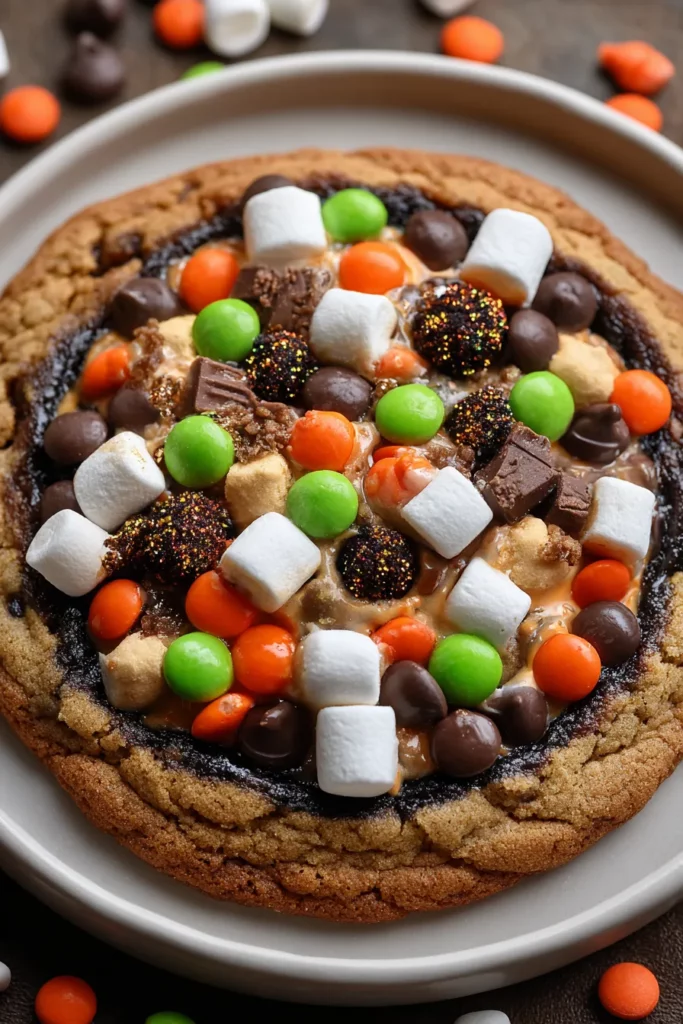

Halloween Cauldron Cookie
Description
These colorful, chewy cookies are packed with chocolate, candy, and a hint of pumpkin spice perfect for Halloween festivities and playful gatherings.
Ingredients
Instructions
-
Preheat your oven to 350°F (175°C) and line two baking sheets with parchment paper.
-
In a medium bowl, whisk together the flour, baking powder, baking soda, and salt. Set aside.
-
In a large bowl, cream the softened butter, granulated sugar, and brown sugar together with an electric mixer until light and fluffy.
-
Add the eggs one at a time to the butter mixture, beating well after each addition. Then, mix in the vanilla extract.
-
Gradually mix the dry ingredients into the wet ingredients until just combined. Be careful not to overmix.
-
Divide the cookie dough into three equal portions in separate bowls. Add a few drops of black food coloring to one, green to another, and orange to the last. Mix each until the color is evenly distributed.
-
Gently fold a different combination of chocolate chips, candy-coated chocolates, and mini marshmallows into each colored dough. For example, you might add black coloring with orange candies, green with chocolate chips, and orange with marshmallows.
-
Scoop tablespoon-sized balls of dough onto the prepared baking sheets, spacing them about 2 inches apart.
-
Bake each batch in the preheated oven for about 10-12 minutes, until the cookies are just set and the edges begin to turn gold.
-
Remove from the oven and let them cool on the baking sheets for a few minutes before transferring to wire racks to cool completely.
Note
- These cookies are perfect for Halloween gatherings and parties.
- Customize the candy coatings and food coloring to create various spooky themes or match specific party themes.
- For a bit of sparkle and fun, sprinkle some edible glitter on top of the cookies before baking.
- Allow the cookies to cool completely before serving to really let the flavors develop.
- Store cookies in an airtight container to keep them fresh and chewy.