

Nothing brings a smile to my face quite like these whimsical No-Bake Moose Farts. With every bite-sized sphere packed full of buttery graham crackers, toasted coconut, and pockets of gooey chocolate, you’ll feel like you’ve discovered a secret dessert society. They’re the perfect no-fuss treat when you’re craving something sweet, playful, and utterly satisfying. From their creamy texture to the little crunch of coconut flakes, these morsels are a celebration of contrasts: rich yet light, sweet yet balanced, and indulgent yet surprisingly simple to whip up. You don’t need fancy equipment, and you won’t break a sweat in a hot oven—just gather your ingredients, roll up your sleeves, and get ready to delight your taste buds.
What I love most about No-Bake Moose Farts is how they take me back to carefree afternoons in my grandma’s kitchen, sneaking spoonfuls of sweetened condensed milk straight from the can. Each bite conjures memories of laughter-filled potlucks and cozy movie nights with friends, passing around a plate until the last one disappears. Whether you’re a seasoned dessert devotee or a kitchen newbie, this recipe welcomes you with open arms—and a dash of whimsy. You’ll be amazed at how quickly these treats come together, giving you more time to enjoy the rewarding moment when that first chocolaty, coconut-kissed morsel melts in your mouth. Get ready to make dessert history at your next gathering; these little orbs of joy are poised to become your new signature sweet.
KEY INGREDIENTS IN NO-BAKE MOOSE FARTS
Before we dive into the fun part of blending and rolling, let’s get to know the stars of our recipe. Each ingredient plays a special role in creating the perfect balance of texture and flavor—the buttery foundation, the crunchy bits, the creamy sweetness, and the chocolatey finish. Here’s what you’ll need:
- Butter
Adds rich, creamy moisture and acts as the glue that helps every component stick together. Melting it gently over low heat ensures a smooth base that won’t separate.
- Graham Cracker Crumbs
Provide a lightly sweet, slightly nutty backdrop and a subtle crunch. These crumbs give structure to the mixture and a touch of classic cookie flavor.
- Sweetened Shredded Coconut
Brings chewy texture and a tropical twist. Toasted to perfection, it balances the recipe with its natural sweetness and fibrous bite.
- Sweetened Condensed Milk
Offers dense sweetness and a silky, binding consistency. This ingredient is the secret to those decadent, caramel-like pockets that make each ball taste irresistible.
- Semi-Sweet Chocolate Chips
Introduce that beloved chocolate hit. As they melt into the warm mixture, they create ribbons of deep cocoa flavor throughout every nook and cranny.
- Vanilla Extract
Elevates the overall taste with floral, sweet notes. Just a splash brightens the richness and rounds out the dessert’s profile.
- Salt
A tiny pinch enhances all the flavors by providing contrast. It keeps the sweetness in check and highlights the chocolate’s depth.
HOW TO MAKE NO-BAKE MOOSE FARTS
Let’s walk through the simple yet enchanting process of turning these ingredients into bite-sized explosions of flavor. With easy techniques and minimal hands-on time, you’ll have a tray of these whimsical treats ready to chill before you know it.
1. In a medium-sized saucepan, place the butter over low heat. Stir gently as it melts, ensuring it softens evenly without browning.
2. Once the butter has completely melted, immediately remove the saucepan from the heat. This prevents the butter from overheating and gives you more control over the texture.
3. Into the warm butter, add the graham cracker crumbs, shredded coconut, sweetened condensed milk, chocolate chips, vanilla extract, and salt. Pour everything in at once to simplify the process.
4. Use a sturdy spoon or a heat-resistant spatula to stir thoroughly. Mix until all ingredients are evenly incorporated and the chocolate chips have melted into smooth ribbons throughout the blend.
5. Line a baking sheet with parchment paper. This step prevents sticking and makes clean-up a breeze.
6. With a spoon or by using lightly greased hands, form the mixture into small, bite-sized balls. Place each one gently onto the prepared sheet, spacing them just enough so they don’t stick together.
7. Transfer the baking sheet to the refrigerator, allowing the balls to chill for at least 1 hour. This resting time lets them firm up and develop their full, rich texture.
8. When they’re completely firm, remove your No-Bake Moose Farts from the fridge. Serve immediately and watch as they vanish from the platter in no time!
SERVING SUGGESTIONS FOR NO-BAKE MOOSE FARTS
Once your morsels are chilled to perfection, it’s time to think about presentation and pairing. Serving these playful bites can be almost as fun as making them. Whether you’re planning a gathering, gifting friends, or simply treating yourself, these ideas will help you showcase their best side—and maybe even inspire some happy oohs and ahhs around the table.
- Festive Platter Display
Arrange the balls in concentric circles on a vibrant serving tray. Garnish with extra toasted coconut and a dusting of cocoa powder for a professional touch that pops.
- Coffee or Tea Pairing
Place a few alongside a steaming cup of coffee or fragrant herbal tea. The slight bitterness of the brew perfectly offsets the sweet condense milk and chocolate, creating a balanced flavor experience.
- Gift-Wrapped Boxes
Layer parchment squares in a small box or tin, then nestle the chilled treats inside. Tie with a ribbon and include a handwritten note—these make delightful homemade gifts any time of year.
- Ice Cream Sundae Topping
Chop a handful of the firm treats into pieces and sprinkle them over vanilla or coconut ice cream. The contrast of cold ice cream and chewy chocolate-coconut bites is simply heavenly.
HOW TO STORE NO-BAKE MOOSE FARTS
Keeping these little delights fresh and flavorful is easy as pie—well, easier, actually! Proper storage ensures each ball remains firm and maintains its signature chewy-truffle texture. Here’s how to preserve their magic for days (or even weeks) to come.
- Refrigerate in an Airtight Container
Place the cooled balls in a single layer or in small stacks separated by parchment paper. Seal the lid tightly to lock in moisture and prevent them from absorbing other fridge odors.
- Freeze for Long-Term Storage
If you want to enjoy these treats beyond a week, arrange them on a baking sheet and freeze until firm. Transfer to a freezer bag or container, and label with the date. They’ll stay delicious for up to a month.
- Room Temperature Brief Hold
When you plan to eat within 24 hours, you can keep them at room temperature in a covered dish. Just be sure it’s a cool, dry spot away from direct sunlight to prevent melting.
- Portion-Control Packs
Prepare small snack-size baggies or jars with just three to four balls each. Keep these in the refrigerator for quick grab-and-go treats that stay fresh and are easy to share.
CONCLUSION
This journey through the world of No-Bake Moose Farts has shown how a handful of accessible ingredients and a little creative spirit can transform an ordinary afternoon into a delightful dessert adventure. We’ve explored each component—from the creamy melted butter that binds, to the shredded coconut that provides a gentle chew, and the chocolate swirls that make every bite irresistible. You’ve seen how straightforward the preparation is, with only a saucepan, a spoon, and a fridge needed to produce these playful, crowd-pleasing sweet bites. Whether you’re hosting a casual potluck, looking for a quick treat to satisfy a chocolate craving, or aiming to surprise friends with a homemade gift, this recipe has your back. Don’t forget—it’s beginner-friendly, requires zero baking, and offers endless opportunities for customization with nuts, dried fruits, or even a pinch of cinnamon for a warm, spiced twist.
Feel free to print this article and save it in your recipe binder or digital archive for the next time you need a dessert that’s both whimsical and dependable. You can also find a FAQ below to answer any lingering questions about ingredient swaps, troubleshooting texture issues, or adjusting sweetness levels. If you try these No-Bake Moose Farts, drop a comment and let me know how they turned out! Have questions, feedback, or tips of your own? I’m all ears and would love to hear about your kitchen triumphs or lend a hand if you hit a snag. Happy no-bake baking!
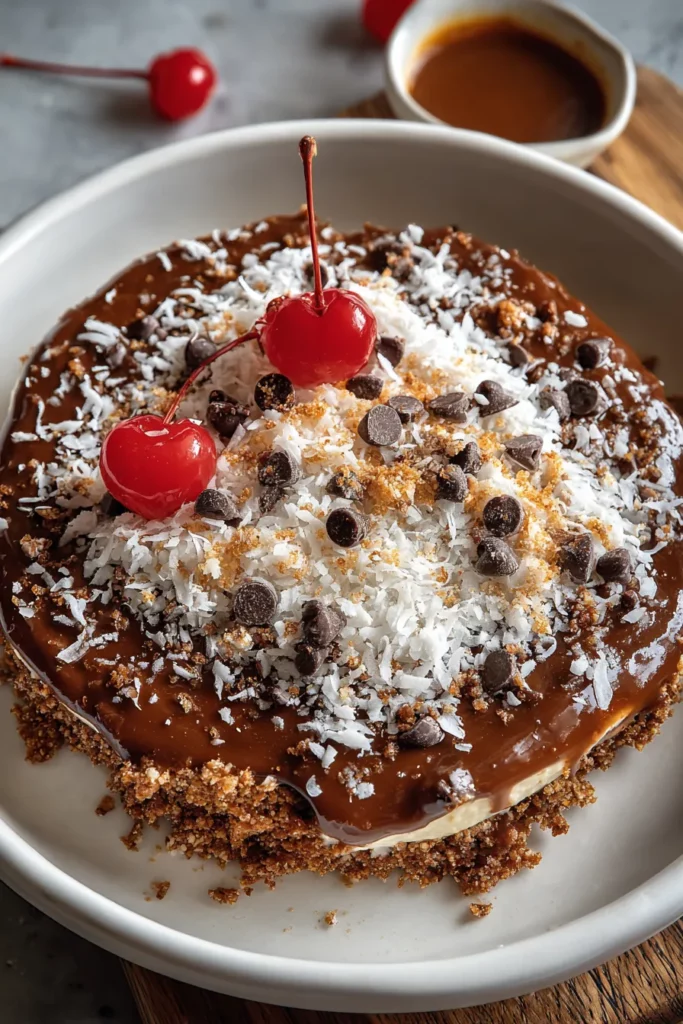

No-Bake Moose Farts
Description
These delightful, bite-sized balls combine rich chocolate, toasted coconut, and buttery graham crackers for an enjoyable treat that's easy to make and share.
Ingredients
Instructions
-
In a medium-sized saucepan, melt the butter over low heat.
-
Once the butter is melted, remove the saucepan from heat.
-
Add the graham cracker crumbs, shredded coconut, sweetened condensed milk, chocolate chips, vanilla extract, and salt to the melted butter.
-
Stir the mixture thoroughly until all the ingredients are well combined and the chocolate chips have melted evenly throughout.
-
Line a baking sheet with parchment paper.
-
Use a spoon or your hands to form small, bite-sized balls from the mixture. Place them onto the lined baking sheet.
-
Transfer the baking sheet to the refrigerator and let the balls chill for at least 1 hour, or until they are firm.
-
Once firm, remove the No-Bake Moose Farts from the refrigerator and serve.
Note
- This treat is perfect for those who are looking for a quick, no-bake dessert option.
- The recipe can be easily adjusted with different mix-ins like nuts or dried fruits.
- Store any leftovers in an airtight container in the refrigerator for up to a week.
- This playful name for a sweet treat is a nod to fun and whimsy.